Free cameras view the area in the direction where the camera is aimed. Unlike target cameras, which have two independent icons for the target and the camera, free cameras are represented by a single icon, making them easier to animate. Free cameras can be used when the camera's position is animated along a trajectory, as in a walkthrough of a building or when the camera is attached to a moving vehicle. The free camera can bank as it travels along the path. If the camera needs to be directly overhead in a scene, use a free camera to prevent it from spinning.
A free camera can move and be oriented without restrictions.
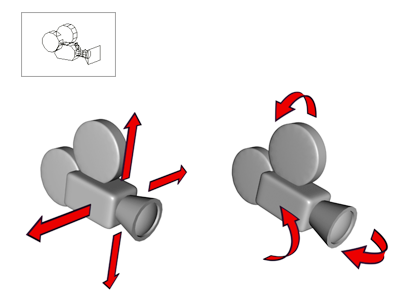
Initial Direction of a Free Camera
A free camera’s initial direction is along the negative Z axis of the active construction grid of the viewport you click.
In other words, if you click in an orthographic viewport, the initial camera direction is directly away from you. Clicking the Top viewport aims the camera downward, clicking the Front viewport aims the camera at the scene from the front, and so on.
Clicking in a Perspective, User, Light, or Camera viewport aims the free camera downward, along the negative Z axis of the World Coordinate System.
Because the camera is created on the active construction plane, where you also create geometry, you might have to move the camera before you can see objects in its Camera viewport. Check the camera’s position from several viewports to correct.
 Cameras Free Camera.
 Create panel, click
  (Cameras), then on the Object Type rollout, turn on Free.
The kind of viewport you click determines the free camera's initial direction: the initial direction is along the negative Z axis of the active construction grid of the viewport you click.
 Rotate and
  move the camera to adjust the point of view.


