For the outdoor vase, you will use a stone material and a slightly different mapping.
Select the vase and isolate it:
 click to select the Plant-Pot object.
 (Zoom Extents All).
You can find this button among the navigation buttons at the lower right corner of the 3ds Max Design window.
Now the viewports show a closeup of the vase (except for Camera-Hi-Point, which retains the camera’s point of view).
3ds Max Design opens a file dialog. In the file dialog, navigate to the \sceneassets\images folder, choose the file travertn.jpg, then click Open.
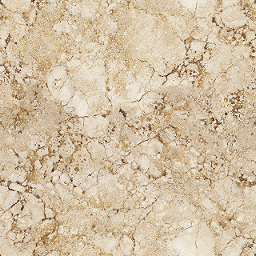
Travertine texture for the vase
 (Show Shaded Material In Viewport) to turn it on. (If you use a legacy viewport driver, this button's tooltip reads, "Show
Standard Map In Viewport.")
(Show Shaded Material In Viewport) to turn it on. (If you use a legacy viewport driver, this button's tooltip reads, "Show
Standard Map In Viewport.")
 (Assign Material To Selection).
In viewports, the vase turns brown, but doesn’t show the map. The vase is an Editable Poly object, and like Editable Mesh, this object type requires a mapping modifier.
Map the vase and adjust the map settings:
 Modify panel, apply a UVW Map modifier to the vase.
If you shade the Front viewport the mapping looks all right, but in the Perspective viewport you can see that the sides appear to be smeared.
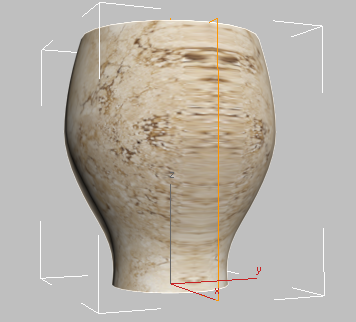
 Orbit the Perspective viewport to see how the map is smeared along the sides of the vase. When you’re done, press Shift+Z to undo the rotation.
 Parameters rollout, change the map projection to Cylindrical.
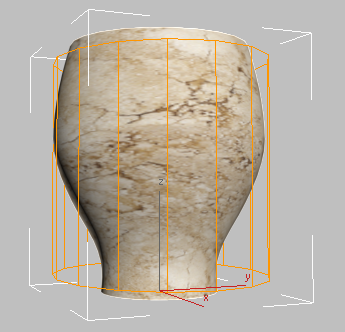
An orange cylindrical “gizmo” shows the cylinder used to project the map. Unfortunately, the default orientation of the cylinder isn’t aligned with the vase, so you need to fix that.
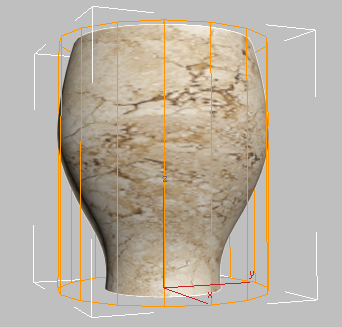
Alignment group, change the axis to X. 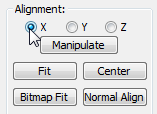
Now the projection cylinder (gizmo) is aligned with the vase.
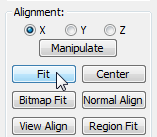
This fits the gizmo to the vase geometry, so there’s no chance of tiling.
Change the surface finish of the vase:

Granite texture to use as a bump map for the vase
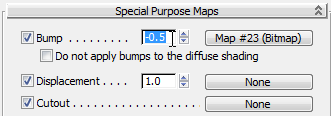
This gives the vase a weathered look when you render it.
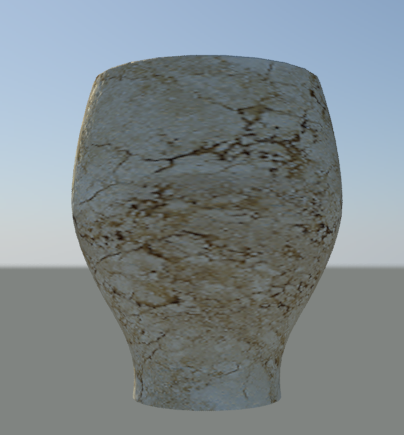
As with the bump map you applied to the terrace tiles, the detailed vase texture won’t be apparent in long shots, but it might come in useful if you render the vase close up.
If a Select Camera dialog appears, choose Camera-Terrace, and then click OK; otherwise, click the Point Of View (POV) viewport
label, and choose Cameras Camera-Terrace to restore the long camera view.