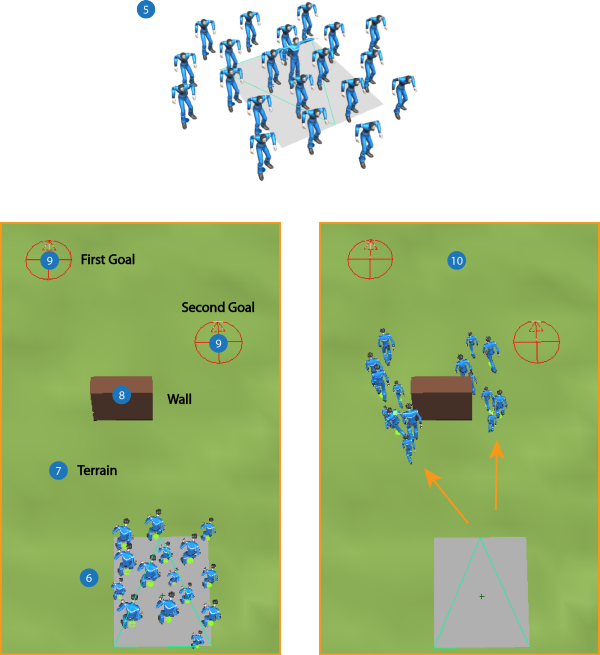
The following workflow shows a typical example of a basic crowd effect using goals and walls.
Each of the numbers in this image corresponds to the steps following it:
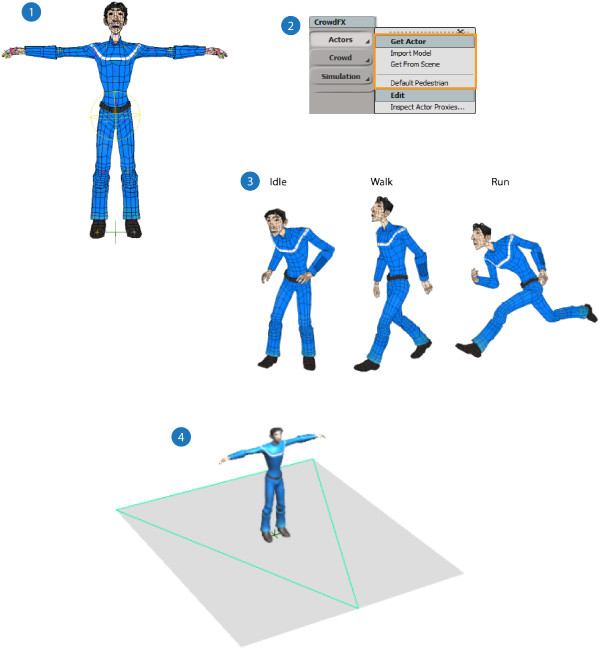
| 1 |
Set up one or more models that meet the CrowdFX requirements as described in Preparing a Model for CrowdFX. |
| 2 |
Get each model into CrowdFX using any of the CrowdFX You can also load a default character for testing purposes. |
| 3 |
Select and load the action sources that each actor will use in the crowd simulation - see Loading Action Sources. |
| 4 |
Draw or select one or more emitters using the CrowdFX If you don't select any emitters, a default is created when you create the simulation (see next step). You can also add more emitters later. |
| 5 |
Create the crowd simulation using one of the CrowdFX |
| 6 |
Set up how the crowd particles are emitted - see Setting Up the Crowd Particle Emission. |
| 7 |
Pick an object as the terrain with the CrowdFX This step is optional, but you may find it useful for certain types of terrains. |
| 8 |
Draw one or more walls as obstacle objects with the CrowdFX This step is optional. |
| 9 |
Create one or more goal objects with the CrowdFX This step is optional. |
| 10 |
Play the simulation! |
Once you have the CrowdFX simulation set up, you can do any of the following tasks (and more) to make it your own:
Set the actors' target speed and modify how the transitions are done between each action - see Controlling the Actor's Animation.
Change how the actors behave to avoid collision with each other and with walls - see Collision Avoidance Behavior for Actors.
Add variation to the actor's envelope with shape keys you have set on the source model - see Modifying the Actor's Envelope with Shape Keys.
Add variation to the actor's materials and/or textures - see Modifying the Actor's Materials and Textures.
Constrain certain deformers in the actor's rig - see CrowdFX Constraints.
Build on the CrowdFX ICE trees with more Crowd nodes and compounds, or use other ICE nodes and compounds as you would normally. See Task Tab - Crowds for a description of each CrowdFX compound.


 Actors