You can create one or more goals to which the actors (particles) in a crowd simulation are attracted, similar to how magnetic attraction works. Goals are null objects that have specific ICE data that CrowdFX understands. You must create these objects using the Add Goal command described below - you can't use other objects as goals. However, you can use goals as proxy objects to represent the real geometry for an object you want to use in the scene.
Throughout the simulation, the actors always try to reach the goals no matter what gets in their way, either other actors or walls. If the goal moves, the actors keep on trying to reach it. When the actors reach the goal, their velocity decreases and they keep moving slowly around the goal.
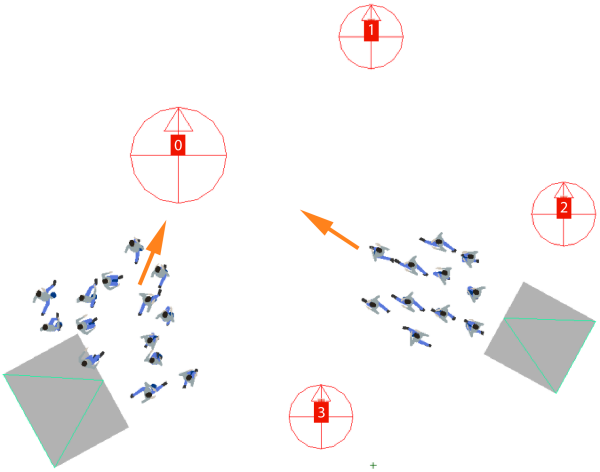
In the image below, the actors move toward the goal that is closest. The wall exit points are "temporary goals" that the actors move toward, then they continue on toward the real goal when they move past these points.
There are three basic ways in which you can make the actors move toward goals:
You can also create groups of goals that can be useful when you are driving several independent groups of actors within the same crowd simulation - see Creating Groups of Goals below.
Adding Goals to a Crowd Simulation
To create goal objects and add them to the current crowd simulation:
Make sure the Crowd model you want to use is the current crowd - see Setting and Selecting the Current Crowd.
Choose the CrowdFX  Crowd Add Goal command from the ICE toolbar.
This creates a customized null as a goal object, located at the scene's origin.
The CrowdFX Goal Property Editor appears in which you can set its properties.
Each goal object is assigned an Index value in the order in which it was created, starting at 0. The Index value is used with multiple goal sequences.
Choose the Add Goal command for each goal you want to create.
By default, the actors move from goal to goal in sequence - see Moving Among Multiple Goals in Sequence below.
The goal objects you create are added under the Goals_Root node and the Goals group in the Crowd model - see Anatomy of a Crowd Simulation.
If you duplicate a goal object, its copy is automatically added under the Goals_Root node and the Goals group. You can then position it as you like and change its Index value to a unique number in the CrowdFX Goal Property Editor.
Hiding or Displaying the Index Values
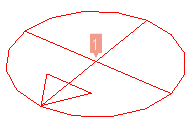
By default, each goal's index value is displayed above it so that it's easy to identify it. You can also display the group's index value.
The goal's size is set by the Min Distance value in each goal object's CrowdFX Goal Property Editor. This is the radius (in units) in which the actors have to enter to be considered as reaching that goal.
Depending on the type of Goal compound you're using, this value has a different effect:
For the Goal Sequencer compound, the actors don't move on to the next goal in the sequence until they have reached their current goal.
The larger the radius, the easier it is for the actors to reach the goal and move on to the next one in the sequence. If this value is low, the actors may get congested around the goal as they each keep trying to reach it, slowing down the progression to other goals.
In the Goal Sequencer compound, you can also set the Min Distance value, then select From Min Distance Input as the Min Distance Mode to override the Min Distance value set in each goal object's CrowdFX Goal property editor. This is an easy way to set the size for all goal objects at once. You can also randomize the minimum distance value here.
Moving Among Multiple Goals in Sequence
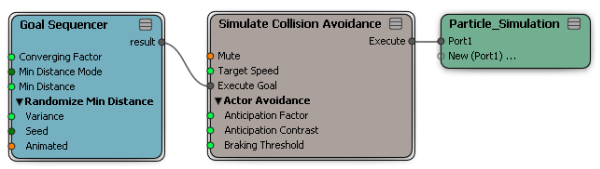
When you create a pedestrian crowd simulation and create goal objects, the default behavior is that the actors move in sequence among the goals. This is because the Goal Sequencer compound is plugged into the Execute Goal port of the Simulate Collision Avoidance compound in the simulation point cloud's Particle Simulation ICE tree.
The order of the goal sequence is based on the goal's Index value that's automatically assigned upon creation. The actors first move toward the goal with the lowest index value, then to the goal with the next highest index value, and so on. Each actor must reach each goal (enter within its radius) in order before proceeding to the next one.
You can control the order in which the actors move from goal to goal by setting the Index value of each goal. By default, the first goal object you create has an index value of 0, then next one is 1, and so on. Each goal must have a unique index value within the same Group Index value (see the section below); for example, Group 0 and Group 1 can both contain goal objects with an Index value of 0.
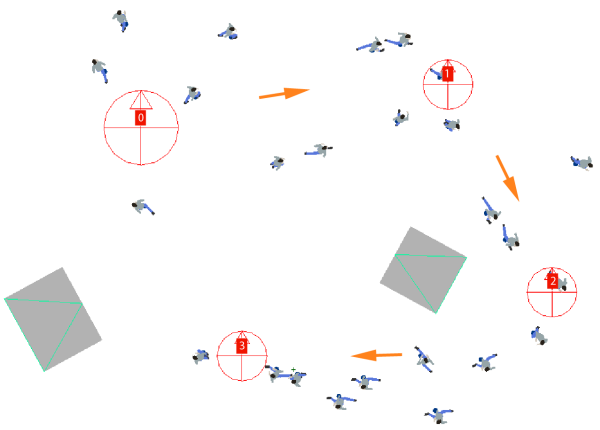
In the image below, actors from both emitters move to Goal 0 first, then the rest in order: 1, 2, and 3.
When you have multiple goals, you can create groups of goals so that one group of actors moves among one group of goals, while a different group of actors moves among another group of goals.
Each goal object belongs to a different group as defined by its Group Index value. By default, this is defined as 0, but you can change it for each goal object.
Set the same Group Index value in the CrowdFX Goal Property Editor for each goal object that you want to be in the same group. Make sure that its Index value is unique within that group.
When you set a value other than 0, the color of the goal object changes from the default red to another color to make it easy to identify that it's in a different group.
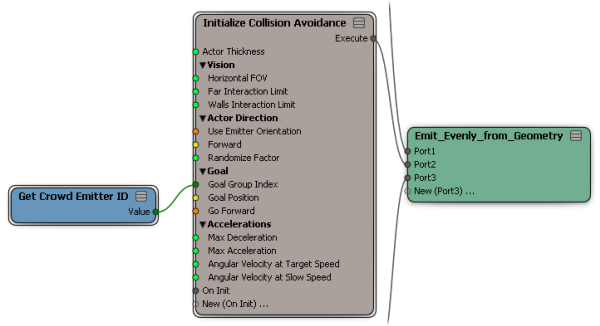
In the Initialize Collision Avoidance compound (in the simulation point cloud's Emit ICE tree), set the Goal Group Index to the index value of the group that you want to use.
This makes all particles in the simulation consider only that group of goals, so you will need to set up some type of condition in the ICE tree to change the behavior on a per-particle basis.
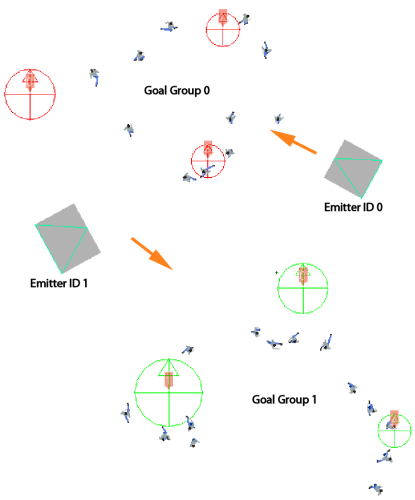
For example, if you to separate the actors into groups based on their emitter, you must first give each emitter a unique ID (in its Set Emitter Data compound). Then plug the Get Crowd Emitter ID node into the Goal Group Index port.
The actors then move among only the group of goals whose Group Index value matches their emitter's ID. They still follow the goal's Index values within their group.
Moving Toward the Closest Goal
You can make the actors in a crowd move to whichever goal which is closest to them using the Closest Goal compound. The goal's Index value is not used in this case: the position of each goal is evaluated in relation to the position of the actors, and the actor moves to the goal object that's closest.
To make actors move toward the closest goal object:
Create one or more goal objects with the CrowdFX Crowd Add Goal command from the ICE toolbar.
Delete the Goal Sequencer compound from the Execute Goal port on the Simulate Collision Avoidance compound in the simulation point cloud's Particle Simulation ICE tree.
Get a Closest Goal compound and plug it into the Execute Goal port.
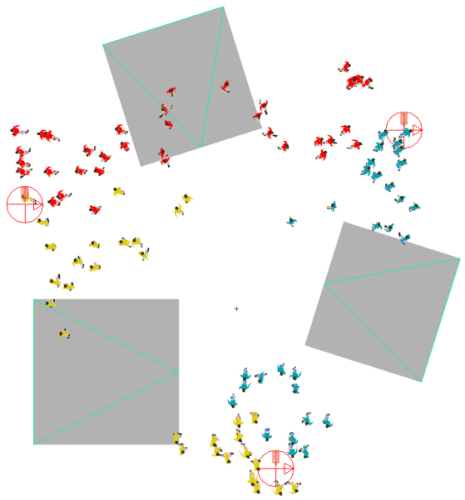
The actors move to random points within the goal's radius (Min Distance) so that they don't all clump up at the same point.
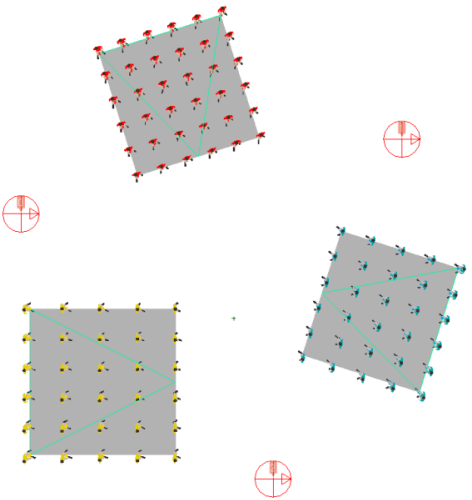
In the image below, the particles are emitted, then immediately head toward the goal object that is closest.