In crowd simulations, particles are emitted with an instance of an actor proxy attached to each particle. As with typical ICE particle emissions, there are a number of parameters you can use to set up the particles to be the way you want.
You can set up the particle emission for the crowd simulation in the appropriate Emit compound that is created by default in the crowd simulation point cloud's Emit ICE tree:
To open the property editor for the Emit compound of the current crowd, choose the CrowdFX  Simulation Edit Inspect Emitter command from the ICE toolbar.
These Emit compounds can also be used for emitting standard ICE particles, but some of the parameters are designed only for crowd simulations.
Setting the Number of Particles
The number of particles is set differently depending on the type of emission you're creating: pedestrian or stadium.
For a pedestrian simulation, you can set the Number of Actors in the Emit Evenly from Geometry compound. This is the total number of particles emitted for the crowd simulation, regardless of the number of emitters or the number of different actor models you're using.
For a stadium simulation, the number of particles is determined by the number of polygons on the emitter object: one particle is emitted on each polygon. You can change the emitter's resolution to change the number of particles. See Using Surface Objects as Emitters for more information.
If you're using the default "bleachers" emitter, you can adjust them in the Bleachers compound in the emitter's ICE tree.
Defining a Pedestrian Actor's "Personal Space" at Emission
The following are parameters in the Emit Evenly from Geometry compound that prevent actors from colliding with each other immediately upon emission. After the particles are emitted, you can add a buffer around each actor to help prevent collisions when moving - see Creating a Buffer Around the Actors.
The Search Radius determines how many units of space are set around each particle upon emission.
The Repulsion Factor is how much the particles are repelled from each other at emission based on their size and distance. This creates a more natural-looking and randomized amount of space around the particles than the absolute unit values defined with Search Radius.
The Max Iterations creates particle clumps (use a low value) or prevents clumps (use a high value).
To prevent actors from being emitted at the same location or close to where there is a wall object (see Avoiding Collisions with Obstacles (Walls)), set the Wall Push Factor.
Setting the Particle's (and Actor's) Size and Scale at Emission
As with regular particle instances, when you set the particle's Size and Scale (the size along each axis) in the appropriate Emit compound, the instanced object (actor) inherits that size and scale. A value of 1 is the same size and scale as the original model from which the actor was duplicated.
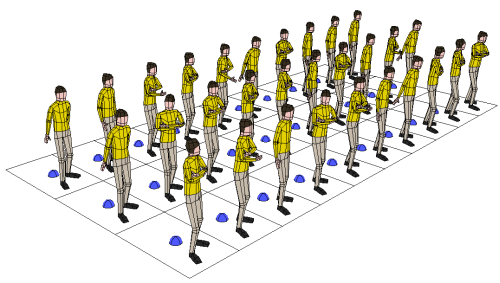
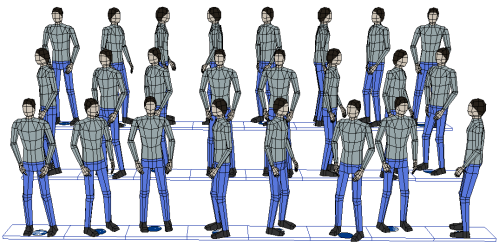
In the image below, a simple Randomize node has been plugged into the Size port on the Emit compound to vary the size of each particle and its actor.
You can also use a scaling constraint compound (or pose constraint) to constrain the scaling of certain deformers in the actor's rig proxy - see Constraining the Orientation or Scale.
Setting the Actor's Orientation at Emission
When particles are emitted, they are oriented in the direction as defined by the emitter object's CrowdFX_Emitter_Forward attribute with their Y axes defined as their up vector.
With a directional emitter, the actors are automatically oriented in the direction of the arrow on the emitter (see Using Directional Emitters). However, you can set a different forward vector for the actors using the Actor Direction options in the Initialize Collision Avoidance compound.
Only rotations about the actor's Y axis are valid.
For pedestrian simulations, you can change the Orientation Y value in the Emit Evenly from Geometry compound.
For stadium simulations, you can set the Orientation mode in the Initialize Stadium Data compound. This orientation can be from either the emitter object (its CrowdFX_Emitter_Forward attribute) or a custom value in which you can specify the angle around the Y axis.
You can also set random offsets from the base orientation within an angle range that you define, then set the Seed value to get a different distribution on the particles.
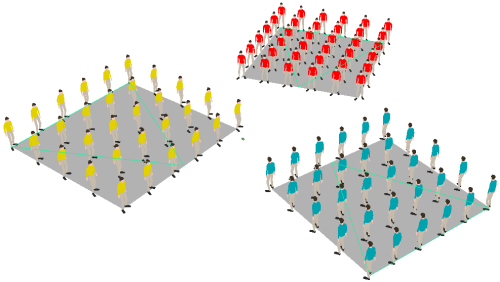
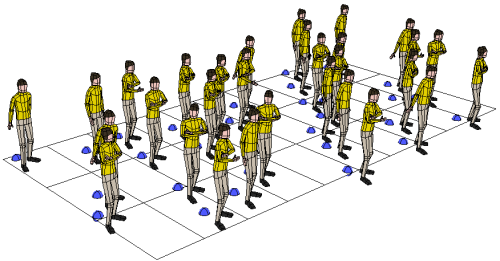
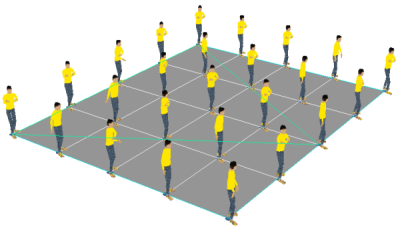
In the image below, the actors are randomly rotated around their Y axes within a range of 0 to 100 degrees.
How Particles Are Distributed on the Emitters
There are several different parameters in both Emit compounds that affect how many particles are emitted and how they're placed when emitted.
In either Emit compound, you can set the Seed value to get a different distribution of particles on the emitters.
Select Delete Outside Boundary to delete any particles that are outside of the boundary of the emitter. Note that this changes the number of particles that are emitted.
Select Boundary Constraint in the Emit Evenly from Geometry compound to keep all particles within the boundary of the emitter object.
Set the Offset from Emitter > X/Z Variance values to vary the position of the particles in X and Z.
Using Weight Maps to Define an Emission Area
You can use weight maps, or other attributes, on the emitter objects to define areas of emission.
Make sure that the emitter object has an appropriate resolution level.
If you're using a directional emitter object, select the Create Grid option and increase the U/V Subdiv values in the Set Emitter Data compound to be high enough resolution for a weight map.
Disconnect the Get Emitter Group node from the Emit Evenly from Geometry compound, then get a separate Get Data for the emitter. This is because the reference to the weight map can only be to an individual emitter object.
If you are using multiple emitters, each one needs to have its own Get Data node plugged into its own Emit node.
In each Emit Evenly from Geometry compound, specify the emitter object's Weights attribute for the appropriate weight map in the Filter > Reference text box.
The syntax should be something like this: cls.WeightMapCls.Weight_Map.Weights
Set the Rate Control to Proportional to Filtered Area.
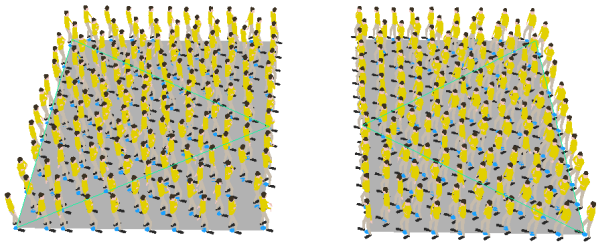
The particles are emitted only where the weight map values are not 0.
Click the Invert option to emit particles where the values are not 1.
Emitting Actors from Points on the Emitter
As with regular ICE particles, you can emit one particle per point with the Emit Evenly from Geometry compound. You may want to do this for crowd simulations that involve marching armies or parade formations.
Make sure that the emitter object has an appropriate resolution level.
If you're using a directional emitter object, select the Create Grid option and make sure that the U/V Subdiv values in the Set Emitter Data compound are at an appropriate level.
In this node, change the Emission Type to Point and the Rate Type to All Points.
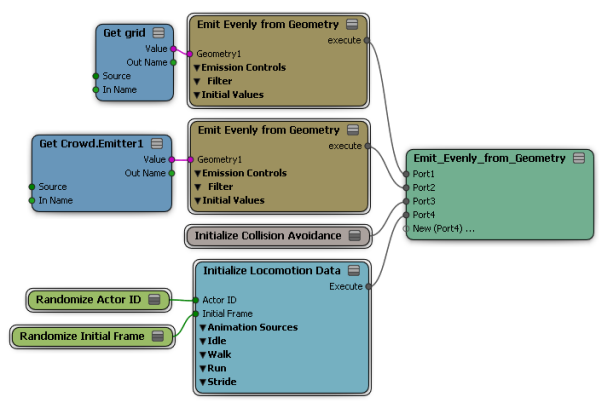
This affects all emitters in the Emitters group, unless you plug each emitter geometry separately into their own Emit compounds (as shown in the ICE tree image above).