In the following procedure, you export a conventional 3ds Max bone system skeleton and use the 3ds Max Send To feature to open it in MotionBuilder for animation.
To export a skeleton in FBX format:
The skeletons.max file opens, displaying two skeletons. Skeleton A is created with the conventional 3ds Max bone system, and skeleton B is created with the 3ds Max Biped creation option.
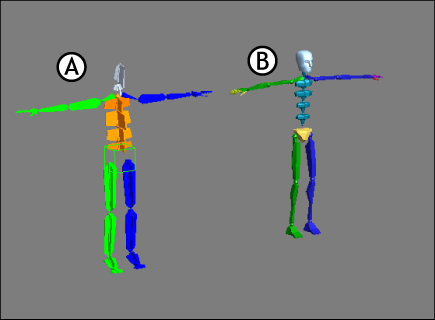
Two 3ds Max skeletons A. Conventional 3ds Max bone system skeleton B. 3ds Max Biped skeleton
The skeletons are positioned in a “T” stance, the pose used by animators for skinning.
To learn how to export skeletons created with the 3ds Max biped creation option, see Create and export a 3ds Max biped.

Biped oriented in a T-stance
The skeleton will characterize perfectly because its bones are named according to MotionBuilder conventions, and is in a T-stance.
The 3ds Max bone system skeleton loads into MotionBuilder.
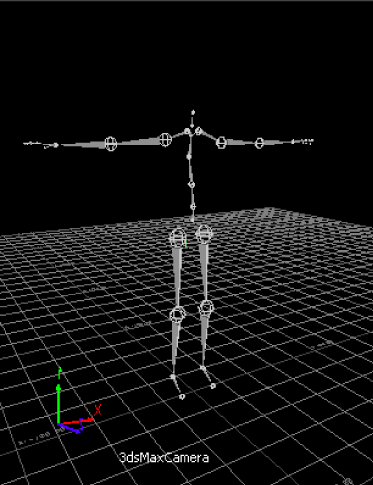 3ds Max skeleton displayed in the Viewer window
To characterize your skeleton:

The following dialog box reminds you that the character must be in a “T” stance and face in the positive Z axis (the equivalent of the negative Y axis that you converted when exporting the .max file into the FBX file format).


Character stance dialog box
The skeleton is now characterized, which means that it is ready to accept a Control rig you can animate.
 From the Character Controls window > Character menu, select Character.
 > Create > Control rig, but setting the rig as a Source makes the skeleton an active character in the scene.)
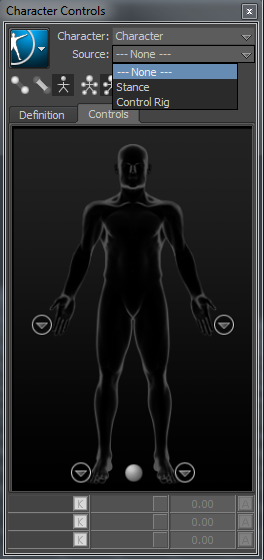
Character Controls Source menu
The Create Control Rig dialog box appears.

FK/IK is the method commonly used to animate characters.
This setting activates the Control rig and the Character Controls Character representation. The Character representation is an image of a human form meant to represent the biped skeleton. It contains all the effectors you need to animate the Control rig, as shown in the following figure.

Skeleton with FK/IK Control rig
Your character is now rigged and ready to receive animation.
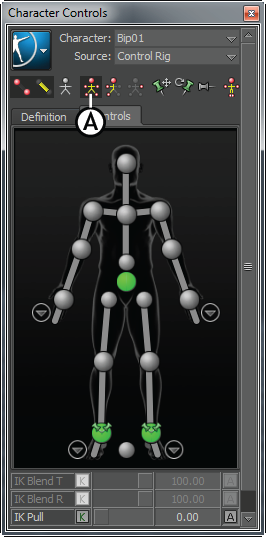
Character controls A. Full Body icon
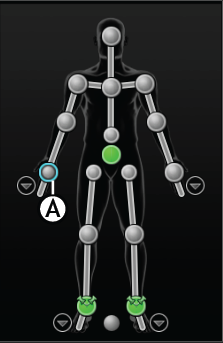
Character representation A. Right Wrist effector selected

Notice as you move the hand, the arm extends and the rest of the body follows in a natural movement. You can now transform the characterized skeleton.