Every bone in the CATRig has an array of controls that defines how it can be manipulated and how it inherits motion. These controls are available on the Hierarchy panel.
The Hierarchy panel settings allow you to configure a rig to be safer and more robust while animating. You can prevent an animator from moving and editing bones in ways that are undesirable for the rig by changing settings. For some examples of how these settings affect the ways bones can be manipulaed, examine the settings on different bones in the preset CATRigs.
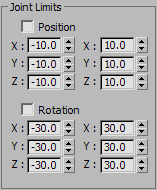
It is possible to set up joint limits using 3ds Max CAT that are independent of the layers. The benefit of using the 3ds Max CAT limit system is that you can limit any kind of controller; for example, you can limit constraints. You could assign a Look At constraint for a character’s eye controllers on their setup controller, and then limit their motion so that they do not turn too far. You can limit TCB Rotation controllers, or any kind of controller that you cannot limit using the standard Limit systems.
Example: To use the Hierarchy panel settings:
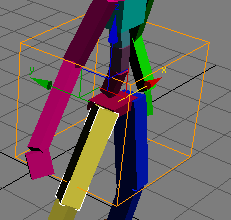
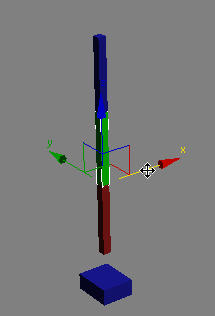
This example uses a simple hierarchy of three Extra Bones, as shown following:
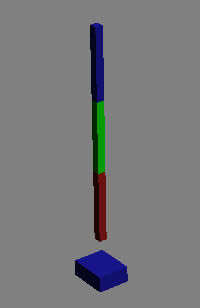
It moves as you might expect, based on standard rules of transforming hierarchy members.

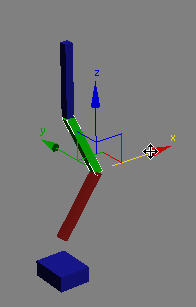
Now, when you try to move the bone, nothing happens, because the position is locked.
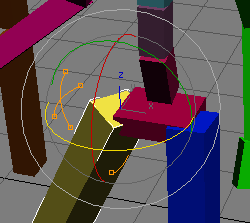
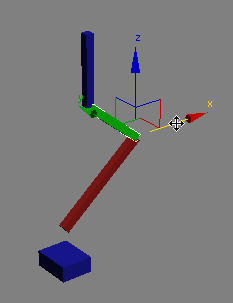
Now, when you move the green bone, its local position doesn't change, but it rotates its parent (the red bone), and also rotates itself to look at its child (the blue bone).
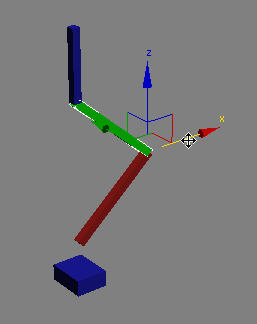
Now, when you move the green bone the red bone stretches to reach the position of the green bone.
Now, when you move the green bone, both the red and green bones stretch to reach the position of the green bone.
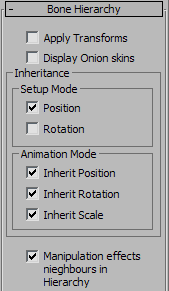
Determines whether this bone is affected by direct transforms (that is, manipulation of its transform gizmo). If a bone has no parent, it usually needs to have this option enabled, while a bone that is a child of another CATBone should have this option off.
Typically, the only bone that needs Apply Transforms to be on is the root hub (the pelvis), and the IK targets need it on as well. When you transform the animation of a layer, child bones in the hierarchy do not need to be transformed separately because they inherit the transformation from their parents. See Layer Transform Gizmo.
Choose either of the following to determine the character pose in Setup mode (when returning from Animation mode):
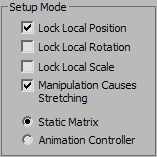
By default, CATBones use a static transform value called SetupTM, which is not visible in the animation editor (because it can't be animated), and is accessible only via MAXScript.
The idea of the setup pose is that it cannot be animated, so no setup animation controller is available by default. When you choose the Animation Controller option, you get a Setup animation controller, as a child of the LayerTrans (Layer Transform) track, that you can view and edit in Track View.
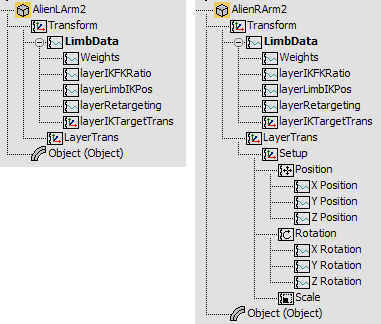
Track View hierarchy of CATbone with Setup Mode set to:
Left: Static Matrix
Right: Animation Controller
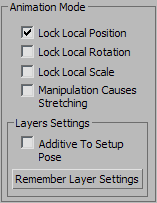
The reason you might want an animation controller in setup mode is to take advantage of the feature Additive to Setup Pose. You can apply your own procedural animation controller setup to the setup controller, and then make the layer system relative to that controller.
You might want to use this capability to customize the inheritance of the arms or head of your character. You can simply assign a constraint to the setup mode controller to define the base value for the animation controllers to animate from. For example, you could make the hands face downward, but apply a LookAt constraint to the setup Rotation track, assigning an object high in the air as the LookAt target, and the ribcage as the Upnode. You could then create a new object, applying an Orientation constraint that targets the ribcage and pelvis, and use this object to drive the setup orientation of your limbs. This would give you flexible control over the way your limbs behave instead of simply ineriting rotation from the ribcage.
You can constrain the tail of your character to a spline, or an IK chain to use spline IK on a tail. In fact, the Apply Max IK utility in the CAT menu does exactly this. If you set the utility’s Pick Layer option to Use Setup Controller, then the CATBone chain is constrained to an IK chain using the Setup mode layer.
If you’re setting up a face rig, you could also write a script to generate automatic eye blinks, or slightly inherit rotations from the eyeball movement. This would give you procedural motion, but with the benefit of 3ds Max CAT's layering system overlaid so you could easily add touches of hand animation on top of the procedural animation.
Why not just put these procedural controllers into a layer, and then apply an additive layer on top for the hand keyframe touches?
The layer system does not get saved with the rig preset, so if you were to save a rig preset, you would lose your work. The layer system is designed to hold keyframe controllers; when you want to build a complex controller configuration, it is often better to put it in the setup controller so that it is embedded in the rig, not restricted to a particular layer.
Layers are specific to the scene. If you put a modification into a layer, it should apply strictly to that scene, rather than to the general rig setup. If you want to add a feature to the rig, then the setup controller is the place to do it.
When on, the position of this bone is locked in Animation mode. If you try to move it, it will not move, but try to move its neighbors if Manipulation Affects Neighbors In Hierarchy is on.
Turn this lock on for bones that you do not wish to move during animation. Then, if an animator tries to move the bone, it will not allow the movement. This setting also affects the Capture Animation tool and the way it maps animation onto this bone.
Click this button to save the current layer configuration to the bone. If you want a bone to use a particular combination of controllers, you can simply setup the desired configuration, and then click this button. The bone then saves that configuration, and then whenever a new layer is added, the bone reloads that configuration.
Also, Remember Layer Settings does not work with Reaction controllers. Reaction controllers are not accessible via the SDK, so it is not possible to save and load them using 3ds Max CAT's animation saver and loader. If you wish so set up Reaction controllers, do so using the Animation Controller option in the Setup Mode group (see preceding). You can set up a Reaction controller on the Setup Controller, and then turn on the Additive To Setup Mode option in the Layer Settings group (see preceding). The RG3 file format can save and load the Reaction controllers with the rig.
Last, you can set up limits using the Limit controller. You can limit your values manually and then click Remember Layer Settings to make the bone remember these limits values and reapply them each time you add a new Absolute layer.