A hub is a special type of CATBone that serves as an organizing device in the CATRig. Typically it’s a centerpoint from which spines, arms, legs, tails, and extra bones sprout. A hub can be a pelvis, ribcage, thorax, or head, depending on its function.
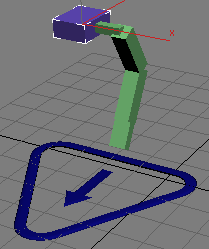
The first hub created is the root object for the rig. In an upright, two-legged creature such as a human or a four-legged creature such as a horse this would be the pelvis.

Basic CATRig with CATParent below and hub (pelvis) above
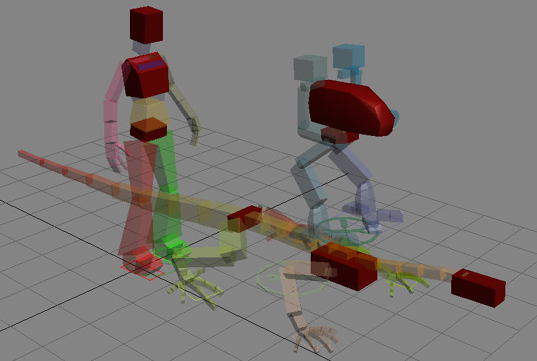
Hubs on different CATRigs

You can specify additional objects such as skin meshes, helpers, and so on, to be included in a custom rig when you add it from the CATRig Load Save rollout. This is particularly useful when you need props that a character carries, such as a sword or a book.
This opens a version of the Select From Scene dialog labeled Pick Extra Nodes.
 Select the CATParent and
on the CATRig Load Save rollout, click the Save button. Give the
rig a name and click Save.
Select the CATParent and
on the CATRig Load Save rollout, click the Save button. Give the
rig a name and click Save.
The custom rig is added to the CATRig list. Now, when you add this rig, the additional objects are added as well.
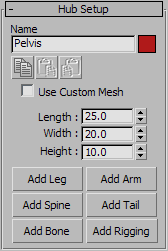
The name of this hub. See Using 3ds Max CAT's Naming System.
 Copy/Paste/Paste Mirrored
Buttons for copying and pasting the hub settings to or from other hubs. See Copying and Pasting Rig Parts.
Toggles the custom mesh for this hub bone. See Customizing the Geometry on CATBones.
Add new limbs to the hub.
Adds a spine to the hub.
Adds a tail to the hub.
Adds an extra bone to the hub.
Adds special rigging objects, such as props, to the hub. For details, see To add rigging objects:.


