Chapter 11, 2D Compositing
| Channel Processing Tools | Multi-stream Compositing | ||
Chapter 11, 2D Compositing |
|||
Use the Composition tools to combine front, back, and matte images using a combination of blending modes and compositing methods.
There are five composition tools:
| Tool: | Description: |
| Blend | Blend two images using a simple blend factor--see Blend. |
| Blend & Comp | Composite front and back RGBA images with blend modes and compositing operators--see Blend & Comp. |
| Blend Matte | Combine two images using a matte to define visibility--see Blend Matte. |
| Comp Ops | Apply compositing operators to two source images--see Comp Ops. |
| Math Ops | Apply mathematical compositing operators to the RGBA values of two source images--see Math Ops. |

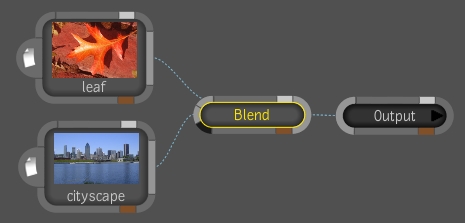
The Blend tool lets you blend two images by applying a blend factor. The image connected to the A input is displayed when the Blend Factor is set to 0; the image connected to the B input is displayed when the Blend Factor is set to 100. The Blend factor, like all parameters, can be animated, making it easy to use this tool to create a blending transition between compositions.
Drag the Blend tool from the Composition folder in Tools tab to the dependency graph in the Schematic view.
Connect the A and B images to the tool.
Set the Blend factor. If you set a value of 0, you see 100 percent of the image connected to the A input. If you set a value of 100, you see one hundred percent of the image connected to the B channel. In the following example, the blend factor is set to 46 percent.
 "Show full-size image")
Note: The Blend tool has a masking input and its attributes are also animatable--see Pixel Masking and Animation Concepts.
The Blend & Comp tool is used to composite front and back RGBA images. While most compositing tools composite a front layer over an opaque background under the direction of a matte image, this tool offers full support for RGBA images, both for the front and back inputs, and computes an RGBA result.
You can specify a compositing operator to control the shape of your output and a blend mode to determine how the front and back are combined in the areas where they overlap.
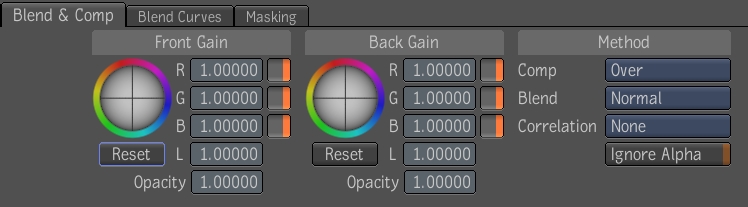
The Blend & Comp tool is in the Composition folder in the Tools tab, and has the following parameters:
 "Show full-size image")
| Use: | To: |
| Front Gain | Multiply the front by a color factor prior to using it in the blend. The default is 100%; the range is [0,10]. |
| Front Opacity | Control the opacity of the front in the compositing. If the opacity is less than one, the front will be more transparent and you will start seeing the back through it. The default is 100%; the range is [0,1]. |
| Back Gain | Multiply the back by a color factor prior to using it in the blend. The default is 100%; the range is [0,10]. |
| Back Opacity | Control the opacity of the back in the compositing. If the opacity is less then one, the front will be more transparent and you will start seeing the back through it. The default is 100%; the range is [0,1]. |
| Comp | Determine which compositing mode will be used (the default is Over)--see Compositing Operators. |
| Blend | Determine which blend mode will be used (the default is Normal). Click the Blend button to view other available modes--see Blend Modes. |
| Correlation | Specify how the two input mattes are correlated. This can be used to improve the quality of the composite in special cases. For example, if you composite two mattes that share a good portion of their outline, you should let the system know if they are Adjacent or Superposed. By default, the correlation mode is None, assuming that, normally, the input mattes are not correlated. |
| Ignore Alpha | The blend mode is applied to every pixel in the image and the alpha channels are completely ignored. The output alpha is simply a copy of the alpha of the back input. By default, this option is false. |
| Reset | Resets the Gain settings to default values. |
Note: The Blend and Comp tool also has a Blend Curves tab--see Blending Curves.
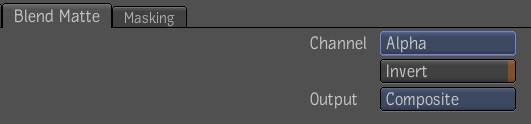
The Blend Matte tool lets you mix two images using a matte image to define the areas of visibility between the front and back images.
Drag a Blend Matte tool from the Composition folder in the Tools tab to the dependency graph in the Schematic view.
Connect the front, back and matte images to the tool.
Select the Blend Matte Channel: Alpha, Red, Green, Blue, or Luma, as appropriate for the image you are using as the matte. The default choice is Alpha.
Select Invert if you want to invert the result.
 "Show full-size image")
Select the tool output: Composite, Front, or Front and Matte.
Note: The Blend Matte tool has a masking input and its attributes are also animatable--see Pixel Masking and Animation Concepts.
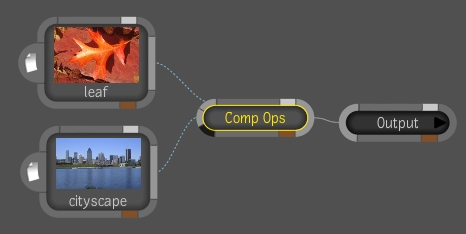
The Comp Ops tool lets you apply a variety of compositing operators to two source images.
 "Show full-size image")
Drag a Comp Ops tool from the Composition folder in the Tools tab to the dependency graph in the Schematic view.
Connect a source image to input A and another source image into input B of the Comp Ops node.
Click the Operator button and select a compositing operator.
| Select: | To: |
| A over B | Place input A on top of input B according to the alpha of the foreground image. |
| B over A | Place input B on top of input A according to the alpha of the foreground image. |
| A in B | Place the RGBA of input A into the alpha of input B. |
| B in A | Place the RGBA of input B into the alpha of input A. |
| A out B | Place the RGBA of input A into the invert alpha of input B. |
| B out A | Place the RGBA of input B into the invert alpha of input A. |
| A atop B | Place the RGBA of input A over the RGBA of input B but through the alpha of input B. |
| B atop A | Place the RGBA of input B over the RGBA of input A but through the alpha of input A. |
| A xor B | Create the union of the RGBA of inputs A and B minus the intersection of the RGBA of inputs A and B. |
Note: The Comp Ops tool has a masking input and its attributes are also animatable--see Pixel Masking and Animation Concepts.
The Math Ops tool lets you apply mathematical blending operations to the RGBA values of two source images.
Use the following procedure to apply mathematical blending operations.
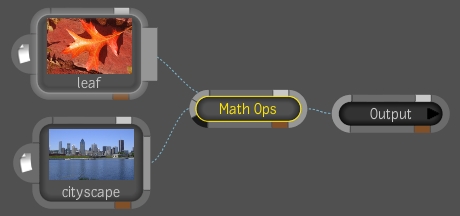
 "Show full-size image")
Drag the Math Ops tool into from the Tools tab to the dependency graph in the Schematic view.
Connect a source image to input A and another source image into input B of the Math Ops node.
Click the Operator button and select a math operator.
| Select: | To: |
| Add | Add to the RGBA of input A, a percentage (using the Blend value) of the RGBA of input B. |
| Div | Divide the RGBA values of input A by the RGBA values of input B. |
| Max | Create a composite image where the final output will be the maximum RGBA values of either input A or input B. |
| Min | Create a composite image where the final output will be the minimum RGBA values of either input A or input B. |
| Mix | Mix the RGBA values of input A with the RGBA values of input B: 0% = completely A, 100% = completely B. |
| Mult | Multiply the RGBA values of input A by the RGBA values of input B. |
| Screen | Mimic the effect of combining two film negatives together. Both layers are inverted, then multiplied, and finally the results are inverted back. |
| Sub | Subtract from the RGBA of input A a percentage (using the Blend value) of the RGBA of input B. |
Blend the images. The blend factor controls the blend between the result of the math operation and the original input.
Note: The Math Ops tool has a masking input and its attributes are also animatable--see Pixel Masking and Animation Concepts.
