Chapter 27, Utilities
| About Utilities | Notes Tool | ||
Chapter 27, Utilities |
|||
 Selecting the Primary and Reference Inputs
The Comparison tool is a viewer tool for comparing two images.
You can place the Comparison tool in either of two locations by dragging and dropping the tool from the Tools tab. Like any other tool, you can place the Comparison tool anywhere in the current composition by dropping the tool in the Schematic, Player, etc.
The Display Tools is the desired location for the Comparison tool. The Display Tools contains two place holders; one for the Comparison tool and one for the Display Modifier. By default these place holders contain the Comparison and the Display Pass Through tools.
 "Show full-size image")
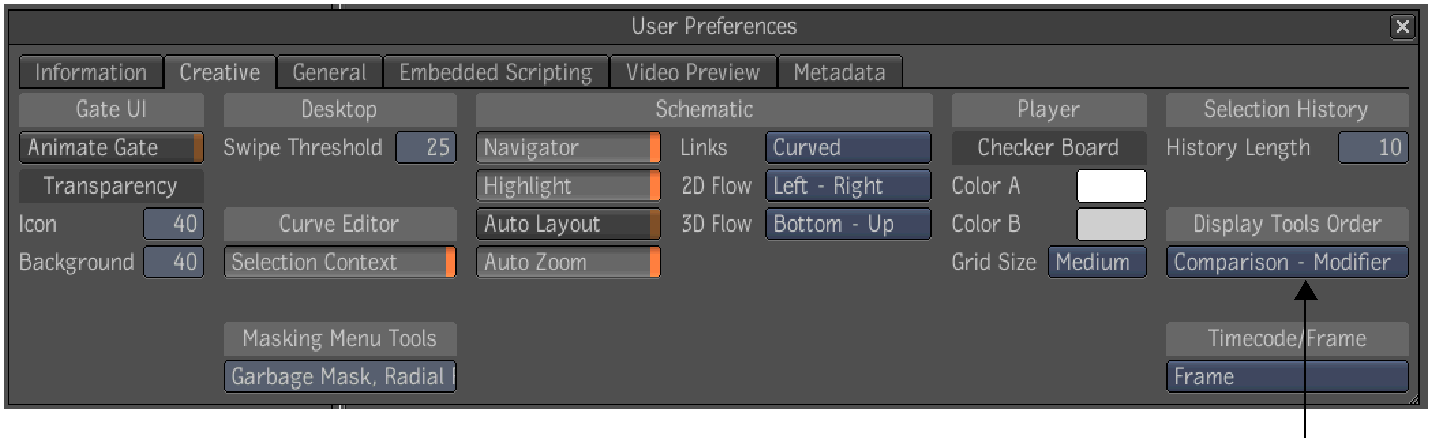
The Comparison tool can be placed either before or after the display modifier. This placement is controlled by the Display Tools Order setting in the User Preferences (Creative tab), which has a default value of Comparison before the display modifier.
 "Show full-size image")
Access to the Display Tools Comparison tool is through the Player options menu in the south gate. By dropping a Comparison tool on the appropriate tab in the Player options, it will replace the current Comparison tool. This is similar to creating a display modifier.

By default the Comparison tool will already exist in the Player (Display Tools) but will be muted.
Do one of the following:
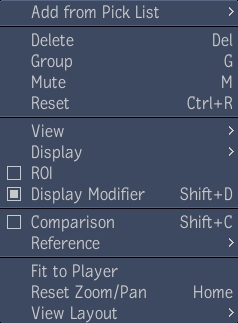
Right-click in the Player and select Comparison.
 "Show full-size image")
Press Shift + C (or Shift + D for the Display Modifier).
Select the Mute button in the tool options of the Comparison Tool tab.
Select the Delete button in the tool options of the Comparison Tool tab.
This causes the Comparison Pass Through tool to be used.
The comparison tool primary input is connected to the output that the viewer would be showing without the comparison tool. The reference input is set to current composition and has all of the display options available in the normal player. They are tool input/output, composition, published result and context points 1 - 4. These options can be changed by using the context menu Reference sub menu in the player. The display options in this menu refer to those of the reference input.
Hotkeys to switch the display options (1-8) will affect either the primary or reference input depending on which side of the manipulator the hotkey event takes place. The player information will indicate what sources are being shown for the primary and reference inputs--see Cycling through Inputs and Outputs.
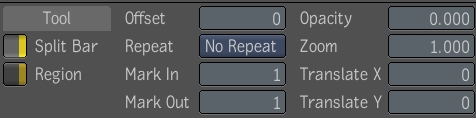
The Comparison tool has the following parameters:
 "Show full-size image")
The comparison tool contains a list of manipulators; a split bar and a region, which can be selected to change the behavior of what areas are being compared.
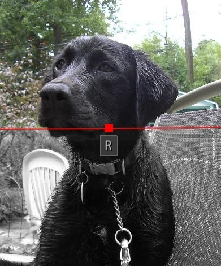
The split bar is the default manipulator. Through direct manipulation, the bar can be moved, rotated, and can have its pivot point changed. By default the split bar separates the viewer horizontally in two with the reference input on the bottom side.
There is a pivot point (indicated by a small box) around which the split bar can be rotated, or from which the split bar can be moved. The letter R next to the pivot box indicates the side of the bar where the reference input is displayed.
 "Show full-size image")
| Reference processed with Gray tool. |
Drag the split bar either above or below the pivot point.
 "Show full-size image")
| Reference processed with Gray tool. |
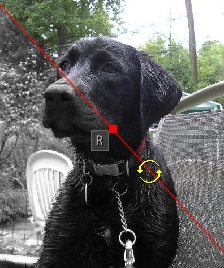
Drag the pivot point. You can also Ctrl + click the viewer to place the pivot point under the cursor, and then drag over the viewer to move the split bar.
 "Show full-size image")
| Reference processed with Gray tool. |
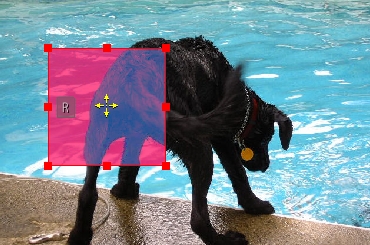
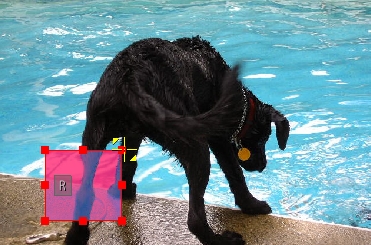
The region rectangle is created and modified through direct manipulation. By default the region will be centered in the viewers. There are pivot points (indicated by small boxes) on each corner and side to change the width and height of the region. The letter R next to the left pivot point indicates whether the reference input is displayed in the interior or exterior of the region.
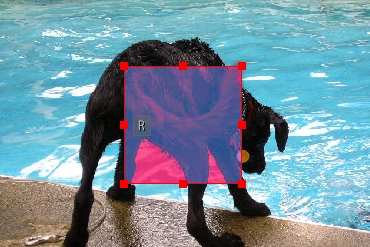
 "Show full-size image")
| Reference processed with Color Space tool. |
Do one of the following:
Drag the interior of the region.
 "Show full-size image")
| Reference processed with Color Space tool. |
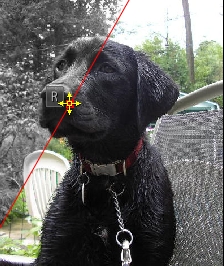
Place the cursor at the location where you want the center of the region to be and press Ctrl + click.
Drag any of the pivot points.
 "Show full-size image")
| Reference processed with Color Space tool. |
Press Shift + H. When the manipulator is hidden, it is still active.
Press Shift + R.
| Use: | To: |
| Offset | Set a time offset--see Linking Compositions. This parameter applies only to the reference image. |
| Repeat | Set the repeat mode --see Linking Compositions. This parameter applies only to the reference image. |
| Mark In/Mark Out | Set in and out points--see Linking Compositions. These parameters apply only to the reference image. |
| Opacity | Vary the opacity of the reference input to reveal the underlying primary image. The transparency will only affect the primary input side of the manipulator. The reference side will always remain 100% opaque. Use Shift + O to toggle the opacity. |
| Zoom/Translate X/Translate Y | Translate and scale the entire viewer using the pan and zoom hotkeys currently implemented. To translate and zoom the reference image, use the controls in the Comparison tool UI. To translate and zoom the primary image, swap the images and use the controls in the Comparison tool UI. |