To build your key, you can use the tools provided on the default processing pipeline as well as set up the pipeline to best suit your needs. Each tool is represented by a process node that you can click to access the node's menu.
The pipeline is made up of three processing branches—one each for the front, back, and matte clips, as shown in the following image.
Red is used for the outline of the front clip proxy and branch, green is used for the back clip, and blue is used for the key-in clip. These colours correspond to the colours of the arrow cursor when selecting clips from the Desktop.
The processing pipeline is similar to the process tree of the Batch module, except that its main purpose is to create a key. Unlike Batch, most of the nodes that you use in the processing pipeline have one input and one output. This allows for a more streamlined schematic. For more information on the Batch module, see Batch Processing.
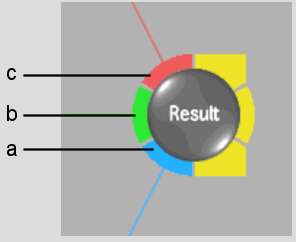
The processes on the pipeline are performed sequentially in the direction of the arrows shown on each branch. The result of each branch is fed into the Front, Back, and Matte tabs of the Result node to create the composite.


(a) Matte tab (b) Back tab (c) Front tab
To process the composite—the output of the Result node—to the destination reel, click the Process button in the Modular Keyer menu.
The pipeline that you see when you first access the Modular Keyer contains certain nodes. These nodes correspond roughly to the functions of the traditional Keyer:
If the node for the operation you want to perform on a clip is not already on the pipeline, you add it to the appropriate branch. For example, to blur the front clip, add an RGB Blur node to the Front branch.