You create 3D text using the 3D Text menu in Action. 3D text strings have the same properties as 3D imported objects. In addition, with 3D text, you specify typical text properties such as font, font size, kerning, and italics. In 3D space, text has depth and can be rotated on the X, Y, or Z axis.
You can create 3D text strings using Type 1, TrueType, or Asian fonts. You set 3D text properties using the 3D Text Editor. To access the 3D Text Editor, add a 3D Text node to your scene, and double-click the 3D Text node in the schematic.


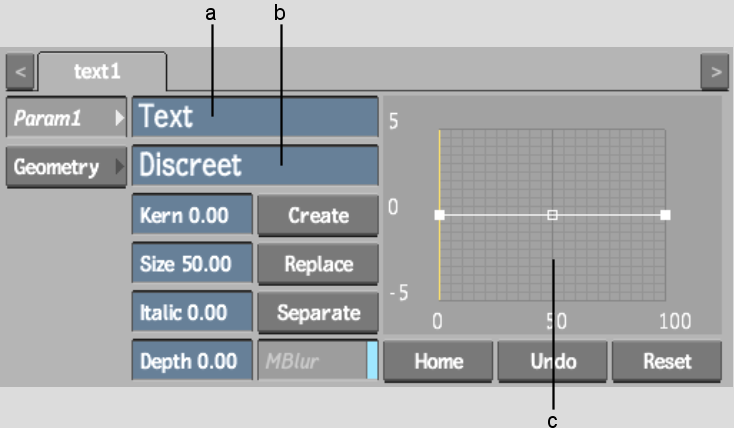
(a) Text field (b) Font field (c) Bevel curve
The 3D Text Editor controls are described as follows.
Text fieldDisplays the characters that make up the text string.
When keyboard preference is enabled, clicking this field displays the on-screen keyboard representing the character set for the selected font. Enable Up ASCII to access the rest of the character set.
Font fieldDisplays the font library, where you select a font for the text string. You can select from Standard, TrueType, and Asian fonts.
By default, Action uses the font specified for the TextDefaultFont token in the init.cfg configuration file. For example:
Kern fieldSets kerning for the characters in the text string.
Size fieldSpecifies font size for the characters in the text string.
Italic fieldItalicizes the characters in the text string.
Depth fieldExtrudes the characters in the text string, making it three dimensional.
Create buttonPlaces the contents of the Text field in the scene.
Replace buttonApplies changes to the 3D text string.
Separate buttonSeparate text so that each letter has its own axis. See Separating Text.
MBlur buttonEnables or disables a motion blur only for the 3D text. See 3D Text Selective Motion Blur.
Bevel curveApplies a bevel to the depth of the text string when you manipulate the Bevel curve. You can move and add points to the curve, as well as adjust the tangent handles to produce different effects with the text string. See Creating Bevelled Text.
Home buttonResets the Bevel curve viewer to show the whole curve.
Undo buttonUndoes Bevel curve operations.
Reset buttonResets the Bevel curve.
Click the Geometry tab to access the Geometry menu to apply any of the geometry settings to your 3D text. See Working with 3D Geometry for definitions of the specific Geometry controls.
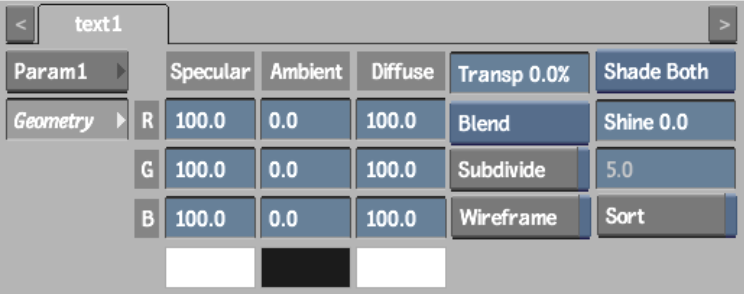
A Geometry object, with it parent axis, appears in the schematic.
To enter Unicode values when creating 3D text objects:


