Show in Contents

Add to Favorites

Home: Smoke

Modifying Clips in Batch

Assembling a Process Tree

Connecting Clips and Nodes

Adding Nodes to the Schematic
You can add as many nodes as you need to create
complex effects. Since Batch is designed to match your workflow,
you add nodes in a similar order as you would by going from module to
module.
To add a node to the schematic:
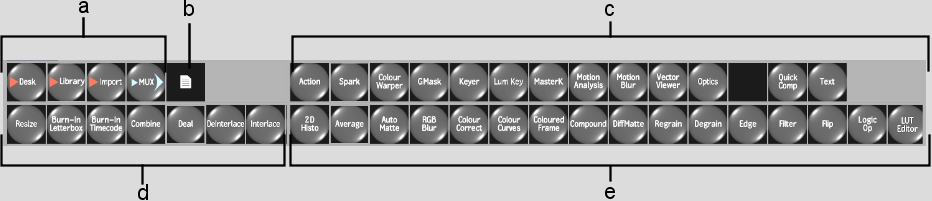
- From the View box, select BatchSchm or
swipe the bar at the left to display the node bins.
TipPress Ctrl+Tab to display the node bins
quickly.
- From one of the four node bins, select
a node.
TipDrag in each node
bin to scroll the nodes.
- Do one of the following:
- Drag the node from the node bin and place
it anywhere in the schematic.
- Double-click the node in the bin to display
a node to the right of the last selected node in the schematic.
To use the node in the
process tree, you must connect it to other nodes or clips. See
Connecting Clips and Nodes.
- In the schematic, click the node to access
the module for the selected node. For example, when you select an
Action node in the schematic and you want to create a composite,
click the Action node to access the full Action module.
NoteSome nodes require
you to enter their module by clicking the Edit button. Once you
have performed your edits, click Return to return to Batch with
the latest unprocessed setup for the selected node.
Repeat this procedure
for all the nodes you set up in your process tree. For a description
of each Batch node, see
Batch: Node Reference.