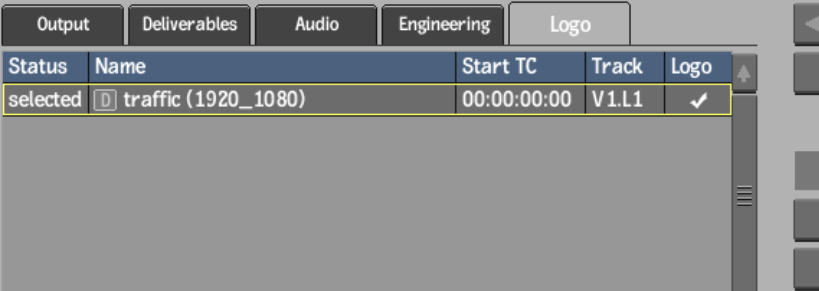
The logo controls are found in the Output Clip menu, under the Logo tab.


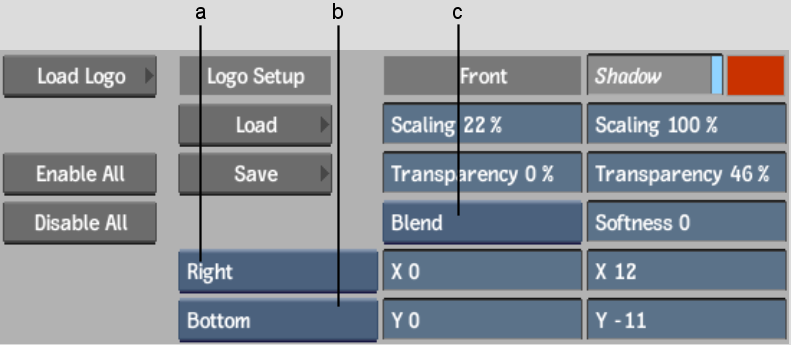
(a) Horizontal alignment button (b) Vertical alignment button (c) Blend Mode box


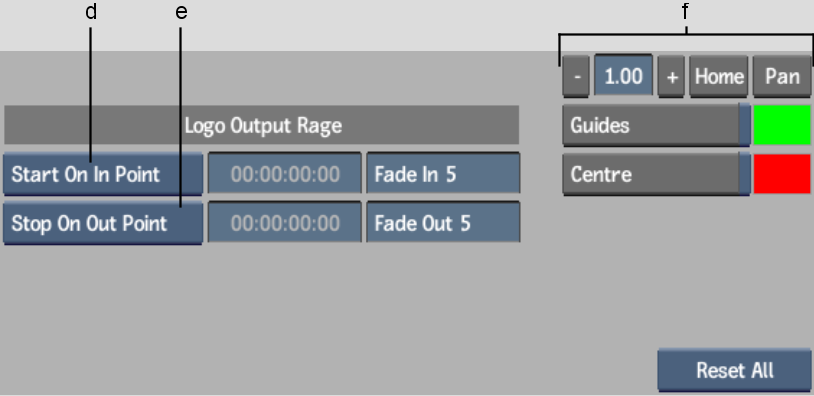
(d) In point (e) Out point (f) Zoom controls
LogoEnables or disables burning of the selected logo on output.
Load LogoOpens the Clip Select menu where you can select logo clips. See Inserting Logos for Real-Time Output.
Enable AllUse to display the logo on all clips to output.
Disable AllUse to remove the logo from all clips to output.
Scaling (Front)Changes the size of the Logo clip. The range of values is 0 to 100, with 100 being the actual size of the Logo clip.
Transparency (Front)Changes the transparency of the Logo (front clip). 0% is Opaque. 100% is Transparent.
Position controls (X and Y fields)Moves the logo along the X and Y axes.
Blend Mode boxSelects how the front and matte clips or the front and back clips are combined:
| Select: | To: |
|---|---|
| Add Trans | Compensate for the soft or anti-aliased edge on an object in a front and matte clip media, with transparency. |
| Blend | Punch the matte through the front. This blends the edge of the front clip and adds additional softness to the media. |
ShadowUses the Matte clip to add a Shadow. The default position is set to X:-5 and Y:-5. A colour pot on the right allows for the shadow colour to be changed.
Scaling (Shadow)Changes the size of the shadow. The range of values is 0 to 100, with 100 being the actual size of the shadow.
Transparency (Shadow)Changes the transparency of the Shadow. 0% is Opaque. 100% is Transparent.
SoftnessSoftness can be added to the Shadow. The range of values is 0 to 200.
Horizontal alignmentPositions the logo along the X-axis using one of the following options:
| Select: | To: |
|---|---|
| Horizontal Centre | Center the logo on the X-axis. |
| Left | Snap the left edge of the clip to the Safe Title guide on the left. |
| Right | Snap the right edge of the clip to the Safe Title guide on the right. |
Vertical alignmentPositions the logo along the Y-axis using one of the following options:
| Select: | To: |
|---|---|
| Vertical Centre | Center the logo on the Y-axis. |
| Top | Snap the top edge of the logo to the Safe Title guide at the top. |
| Bottom | Snap the bottom edge of the clip to the Safe Title guide at the bottom. |
GuidesEnables the display of the Safe Action and Safe Title guides within the Clip Preview window. Use the colour pot to change the colour of the guides.
CentreEnables the display of the Centre guide within the Clip Preview window. Use the colour pot to change the colour of the Centre guide.
In pointSelect an option to specify when the logo appears on the clip:
| Select: | To: |
|---|---|
| Start On In Point | Have the logo appear at the in point of the clip. |
| Start After Frames | Specify after how many frames the logo appears. Enter the number of frames in the adjacent field. |
Out pointSelect an option to specify when the logo disappears from the clip:
| Select: | To: |
|---|---|
| Stop on Out Point | Have the logo disappear at the out point of the clip. |
| Duration | Specify how long the logo remains on screen. Enter the duration in the adjacent field. |
| Stop Before Frames | Hide the logo before the end of the clip, by the number of frames specified in the adjacent field. For example, selecting this option and entering a value of 5 makes the the logo disappear by frame 15 in a 20-frame clip. |
Fade InDefines the length of the logo fade in. A value of 0 indicates there is no fade in.
Fade OutDefines the length of the logo fade out. A value of 0 indicates there is no fade out.
Zoom controlsThe small output clip menu is not available from the Logo tab. Use the Zoom controls to view oversized clips.
Reset AllUse to reset the Logo controls to default:
| Select: | To: |
|---|---|
| Reset All | Reset every field, and delete the logo. |
| Reset | Reset every field, but keep the logo. |