Show in Contents

Add to Favorites

Home: Flame

Creating Animations

Creating Animations

Setting Keyframes Manually

Setting Keyframes Automatically
The following procedure illustrates the animation
workflow by describing how to set keyframes automatically for the
saturation channel in the Colour Corrector. Subsequent procedures
illustrate how to create animations in Paint and Action, respectively.
To
animate saturation in the Colour Corrector:
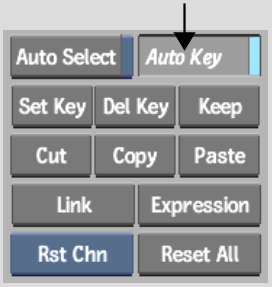
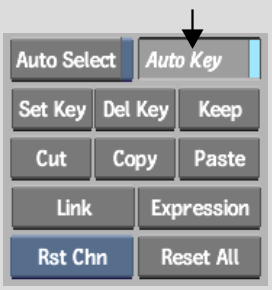
- In the Colour Corrector menu, enable
Auto Key.
When Auto Key is enabled,
a keyframe is set automatically each time you change a value at
any frame.
- In the timebar, position the clip at
the first frame.
- In the channel hierarchy, click
 beside the Master folder.
TipPress
Alt and click to expand the folder
and all subfolders. When several folders are expanded at once, it
can be hard to match animation curves with their corresponding channel
in the channel hierarchy. Collapse folders you are not using to
isolate the channel you want to edit by clicking

. See
Displaying Channels.
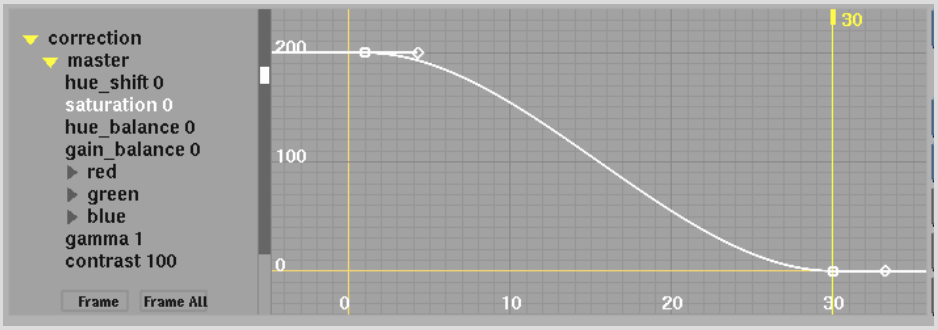
- Select the saturation channel and double-click
the value.
- Enter 200.
- In the timebar, position the clip at
frame 30.
- In the Channel Editor, double-click saturation
and enter 0.
The second keyframe is
set. The channel name and curve are highlighted.
You have created an animation
that reduces the saturation over 30 frames.
- In the Animation controls, click Frame
Chn.
The Frame Channel button
adjusts the zoom factor in the Animation Curve window so that the
selected curve is displayed completely. In this way, you can see
the full shape of the curve from the first keyframe to the last
keyframe.
- Preview the result by clicking Process.
- Modify values, animation curves, and
interpolation to refine the animation until you are satisfied with
the result. See
Editing Keyframes and
Setting Interpolation.
- If you are animating several channels
in the Colour Corrector, you can adjust the timing of the animations.
See
Controlling the Speed of Objects.
- If you intend to create keying and compositing
animations, save the current setup in the Colour Corrector and reload
it later in Batch.
In Batch, use the Universal
Channel Editor to synchronize animations among Colour Corrector,
Keyer, Action, and other nodes. See
Synchronizing Animations.
To animate the size and colour of a brush stroke
in Paint:
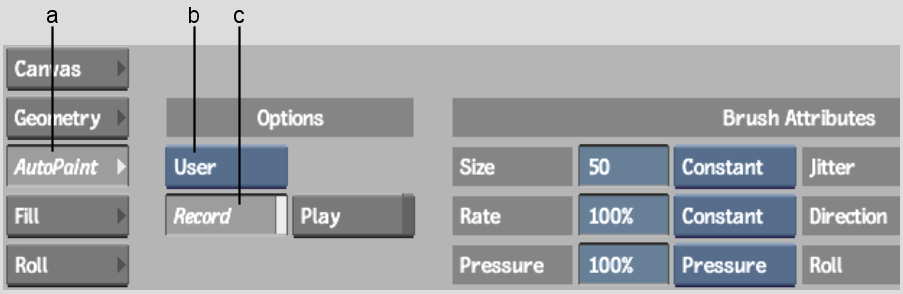
- Click Paint, and then click AutoPaint.
The AutoPaint menu appears.
- Set the following options:
- Enable Record.
The Record button records
the brush strokes. See
Recording Brush Strokes.
- Create brush strokes by painting on the
clip.
Once you are finished
recording the brush strokes, you are ready to animate the brush
and brush stroke attributes.
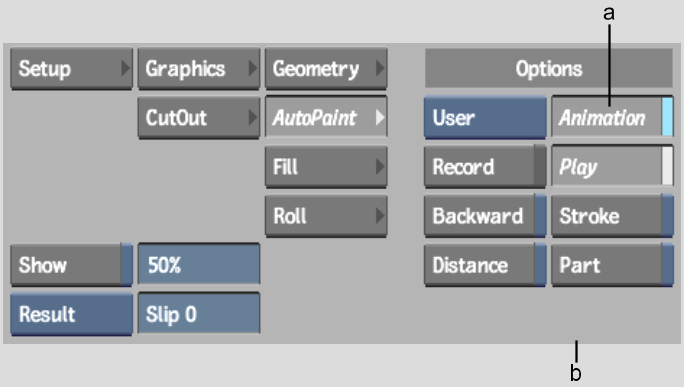
- Click below the timebar to stop recording.
Record is disabled and
you are in Play mode.
- Enable Animation.
- Swipe the bar at the bottom of the Paint
menu to display the Channel Editor.
- In the animation menu, make sure that
Auto Key is enabled.
- Move the positioner to the first frame.
- In the channel hierarchy, open the Brush
folder and set the following channel values:
- Set the Size channel to 1.
- Set the Colour g (green) channel to 12.
- Move the positioner to frame 7 and set
the following channel values:
- Set the Size channel to 50.
- Set the Colour g (green) channel to 98.
- Move the positioner to frame 11 and set
the following channel values:
- Set the Size channel to 66.
- Set the Colour g (green) channel to 100.
- Set the Colour b (blue) channel to 48.
- Move the positioner to frame 30 and set
the following channel values:
- Set the Size channel to 118.
- Set the Colour g (green) channel to 17.
- Click Process and then play the clip
to view the result of the animated brush stroke.
To
animate the transparency of media in Action:
- In Action, load a front, back, and
matte clip.
- Add a surface for the media.
- In the Action menu, enable Auto Key.
When Auto Key is enabled,
a keyframe is set automatically each time you change a value at
any frame.
- Move the positioner to frame 1.
- Click Object to display the Image menu.
- Enter 0.0% in the Transparency field.
- Move the positioner to frame 10 and set
the transparency to 16%.
- Move the positioner to frame 20 and set
the transparency to 40%.
- Move the positioner to frame 30 and set
the transparency to 100%.
- Click Animation and open the image x folder,
where x is an integer representing
the image.
- Select the transparency channel.
Keyframe indicators appear
as blue bars in the timebar.
- Click Process and then play the clip
to view the result of the animated media transparency.
- If necessary, edit the timing of the
keyframes in the Track Editor to make sure all of the different
animations occur in proper sync. In a viewport, press F5 until the Track Editor appears,
or select Tracks from the Channel View box.