Use the System & Menu Settings page to configure the system, match grade, assemble, and playout settings for this user.


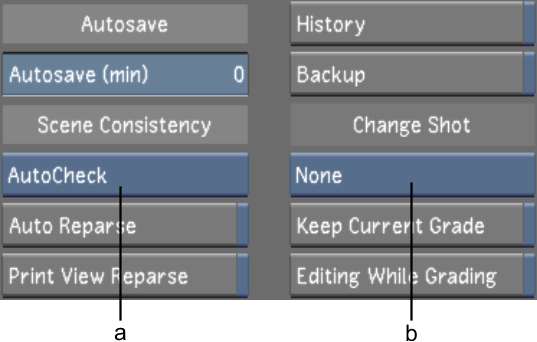
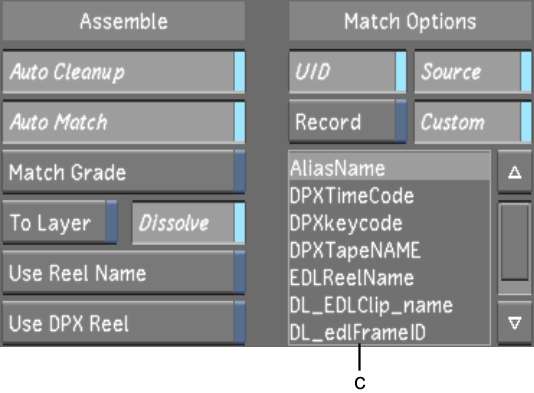
(a) Scene Consistency option box (b) Change Shot option box (c) XML Tag Options list
Autosave slider Use to define, in minutes, the frequency with which Lustre automatically saves a backup of the grade and cut you are working on.
Scene Consistency option box Toggle to verify inconsistencies in the file metadata when loading.
| Select: | To: |
|---|---|
| AutoCheck | Check the cut files when loading to look for inconsistencies in the metadata. Results are printed out to the console window. |
| AutoRepair | Perform the same task as above but additionally, to repair all inconsistencies. |
| None | Disable the Scene Consistency function in Lustre. |
Auto Reparse button Enable to force Lustre to reparse the project structure and source material at start-up.
Print View Reparse button Enable to have Lustre reparse the project structure and source material in Print View.
History button Enable to create a history file for each grade whenever you save the grade. Any subsequent grade that you save will also save the cut and grade files to a unique <grdxx_bak> backup directory, which is automatically created in the current scene’s sacc_data sub-directory in the Project Home location. The backup directory name has the same name as the grade.
Backup button Enable to save a copy of the current grade metadata on the system disk. If you save over your current grade, or save a new grade, a backup copy of all the grade metadata from your current grade is saved in a folder named backup that is automatically created in the default location where Lustre is installed (C:\Program Files\Autodesk\Lustre<version_number> for Windows or usr/autodesk/lustre_<version_number> for Linux).
Change Shot option box Toggle to define the change operation settings.
| Select: | To: |
|---|---|
| Do | Force a Do operation after changing the shot. |
| DoAndClearUndo | Force a Do operation and flush the undo buffer after changing the shot. |
| None | Not force a Do operation nor flush the undo buffer after changing the shot. |
| ClearUndo | Flush the undo buffer after changing the shot. |
Keep Current Grade button Enable to configure Lustre not to remove a current grade from memory when loading a scene.
Editing While Grading button Enable to make editing hotkeys available when you are in the colour grading menus.
Auto Cleanup button Enable to automatically perform cleanup during an EDL assembly. When Lustre performs an EDL cleanup, it arranges EDL events according to record timecode and deletes problematic events. For example, if an EDL has two events with conflicting timecodes, the event with the lower number is deleted during cleanup.
Auto Match button Enable to automatically match EDL event timecodes to available shot timecodes in the Shot bin during assembly.
Match Grade button Enable to apply the current grade settings to a new assembled timeline without having to create a new cut file and use the Change Cut option.
To Layer button Enable to assemble a cut to a new layer above the existing layer(s) in the currently loaded cut. This features is disabled by default.
Dissolve button Enable to include all dissolves in the EDL. If this button is disabled, dissolves are not part of a timeline after the EDL assembly.
Use DPX Reel button Enable to match the EDL reel name to the reel name in the DPX header during an EDL assembly.
UID button Enable to configure matching to be based on the shot's unique ID during EDL assembly.
Source button Enable to configure the matching to be based on the source data, such as a shot's source timecode, during an EDL assembly.
Record button Enable to configure the matching to be based on the record data, such as an EDL's record timecode, during an EDL assembly.
Custom button Enable to use one of the cut file's metadata as matching criteria during EDL assembly.
XML Tag Options list Select one of the cut file's metadata from this list to use as a matching criteria during an EDL assembly. You must enable the Custom button before performing this operation.
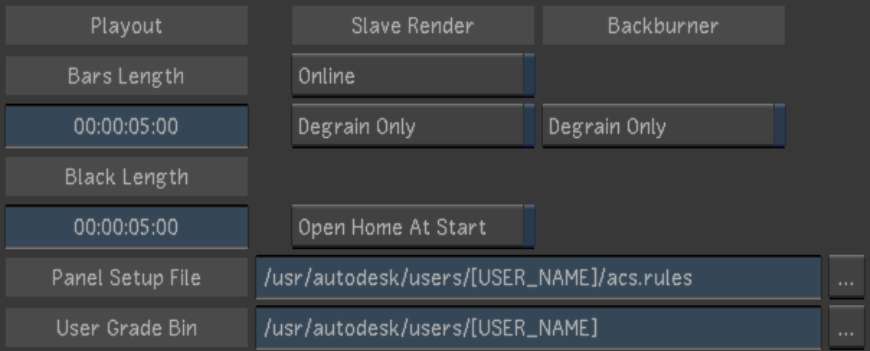
Bars Length slider Use the slider to define the default minimum colour bars length when recording in Record mode.
Black Length slider Use the slider to define the default black length time when recording in Record mode.
Slave Render Online button Enable to connect to the Slave Renderer server as it is defined in the init.config file. Once this feature is enabled, you can enable or disable Slave Renderer from the Render > Slave Render menu.
Slave Render Degrain Only button Enable to set the default state of the On/Off button in the Degrain Only panel of the Render > Slave Render menu.
Backburner Degrain Only button Enable to set the default state of the Degrain Only button in the Render > Backburner menu.
Open Home At Start button Enable to set the file browser to display the contents of your project's Scans Full directory at start-up.
Panel Setup File field Enter, or browse to, the location of the control panel rules file or browse and enter a new path for this file. The default path for this file is the User folder of the application. For information about defining paths, see Browsing for Paths.
User Grade Bin File field Enter, or browse to, the location of the grade files for the current user. The default path for these files is the User folder of the application. For information about defining paths, see Browsing for Paths.


