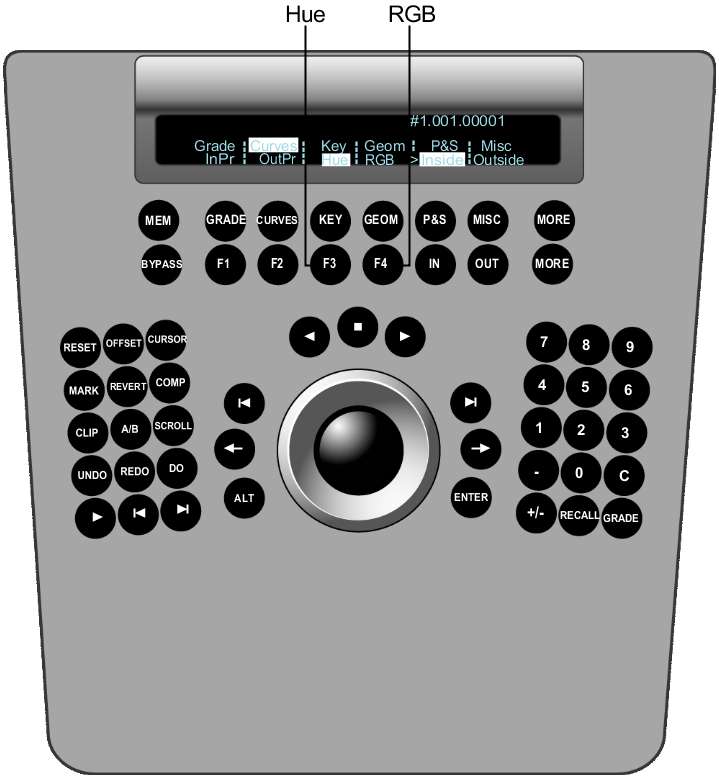
When the Curves menu is
enabled, you can use the Function panel to:
- Modify Hue and RGB curves either after
the initial primary colour grade, or after the addition of any Lustre Sparks® effects.
- Adjust the Hue, Lightness, Saturation,
and Luminance curves separately.
- Modify the entire curve uniformly or
modify individual vertices for RGBCMY channels (red, green, blue,
cyan, magenta, and yellow).
To modify Hue and RGB curves:
- Press Curves on the Navigation panel.
The In Primary, Out Primary,
Hue, and RGB options are activated.
- Do one of the following:
- Press the F1 option button to indicate
that you are working on the initial primary grade.
- Press the F2 option button to indicate
that you are working on final curve modifications.
- Do one of the following:
- Press the F3 option button to work on
Hue curves.
- Press the F4 option button to work on
RGB curves.
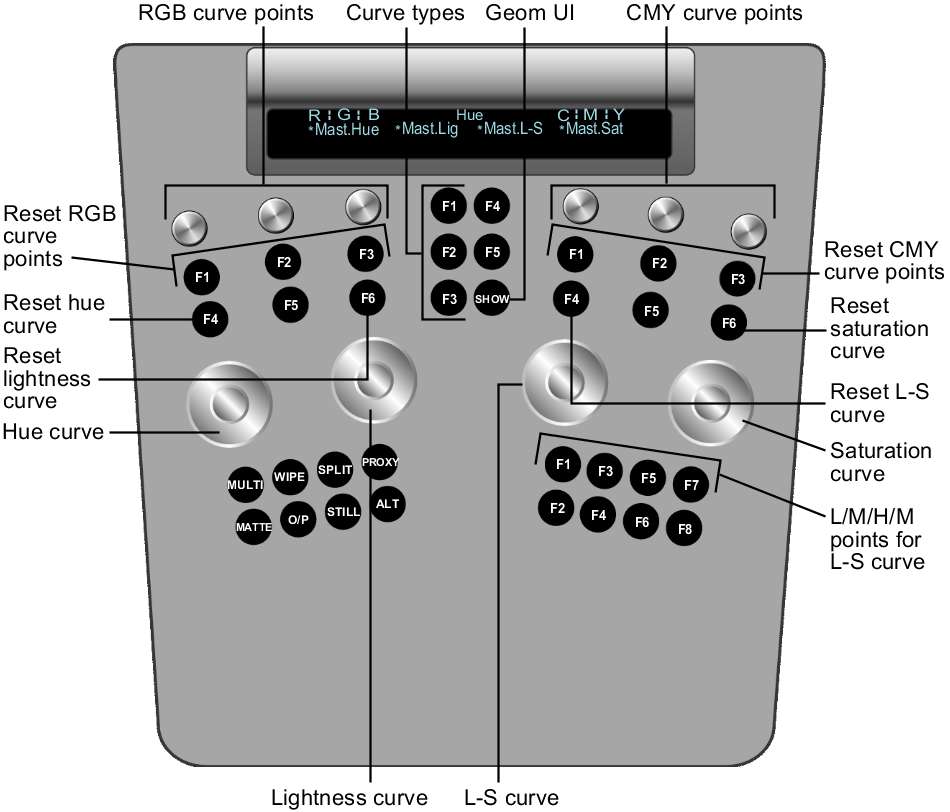
- On the Function panel, use the following
controls.
| Use: |
To: |
| Wheels |
Make overall changes to curves. Wheel 1=Hue curves Wheel 2=Lightness curves Wheel 3=L-S curves Wheel 4=Saturation curves To reset a wheel, press
the button above it.
|
| Knobs at top left and top right |
Individually modify RGBCMY curve points. Knob 1=Red Knob 2=Green Knob 3=Blue Knob 4=Cyan Knob 5=Magenta Knob 6=Yellow To reset a knob, press
the button below it.
|
| Buttons in centre column |
Select the type of curve to be modified using the RGBCMY
curve points. F1=Hue F2=Light F3=Saturation If you press the F1 button
when working with RGB curves, you are toggled to Hue curves.
|
| First row of buttons at bottom right |
Select the low point, mid point, high point, or all for
the L-S curve. F1=Low F3=Mid F5=High F7=Master
|
| SHOW button |
Toggle the geometry wireframe on or off. |


