Pasting a keyframe sequence that extends beyond the boundary of the target shot can be really useful when creating a dissolve. See Creating Dissolves.
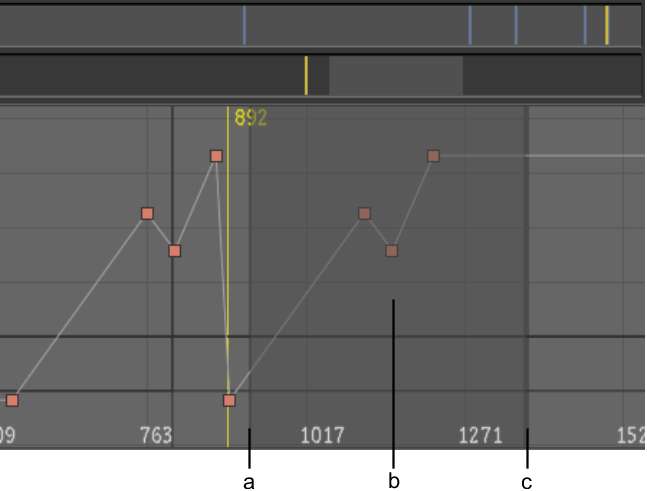
The target shot can be shorter in length than the keyframe sequence due to its actual length or its having been trimmed. When you copy and paste a keyframe sequence that exceeds the boundary of the target shot that has been trimmed, the excess keyframes in the sequence are still pasted, but they appear in a greyed out area. The greyed out area represents the available handles of a trimmed shot and contains the “inactive” keyframes, as seen in the following example. This means the keyframes are available for creating a dissolve.


(a) Shot boundary (b) Excess keyframe data (c) Beginning of next shot
You can also paste a keyframe sequence to a target shot that is of equal or greater length and then manually trim the shot. The keyframes will still exist in the handles (greyed out area). The excess keyframes can also be viewed in the Animation > Timeline view.


(a) Pasted keyframe sequence (b) Positioner (where first of copied keyframes is pasted) (c) Shot boundary