Use the ReGrain command to restore the film
grain on a clip that had been degrained, or to add grain to a clip
originating on video or CG so as to make it look like film.
ReGrain synthesizes preset
or custom grain signatures by modulating noise according to the
luma of the image. This modulation is defined by granularity curves
that specify the gain for the luma values of each channel.
- When you use a preset grain signature,
these curves are implicit in the menu controls.
- When you define a custom grain signature,
you work with these curves directly.
TipIf you want to colour
correct a clip to which you are planning to add grain, you usually
get better results when you colour correct the clip first, and then
add the grain.
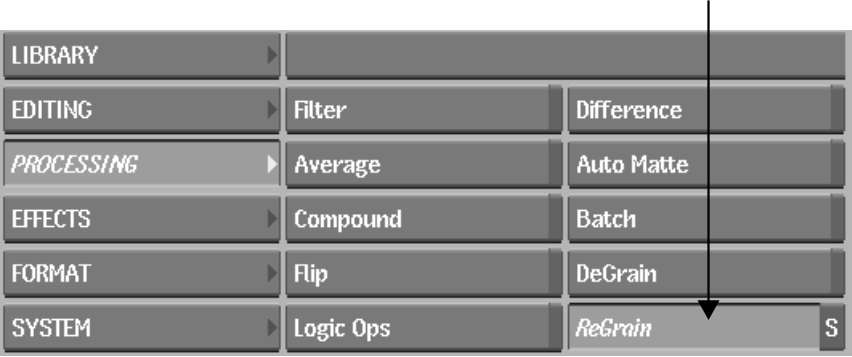
To access ReGrain from the Desktop:
- From the Main menu,
click Processing, then click ReGrain.
- From the Input Mode box that appears,
select Front.
- Select the clip to which you want to
add grain, and then select the destination reel for the processed clip.
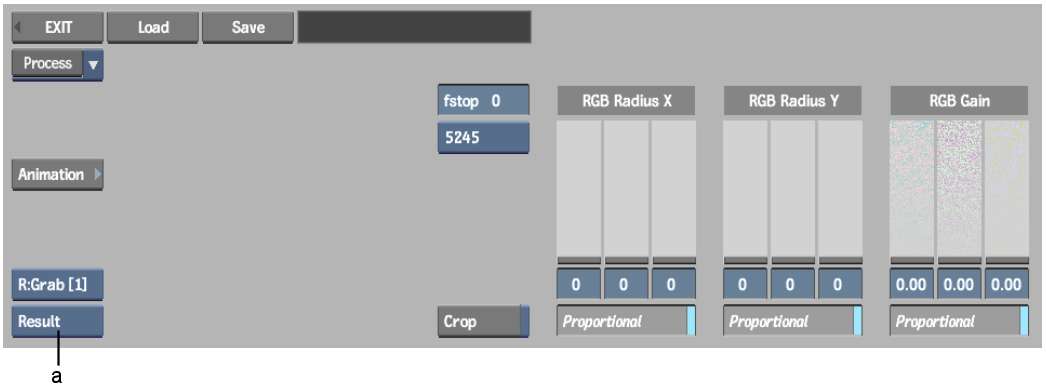
The ReGrain menu appears.
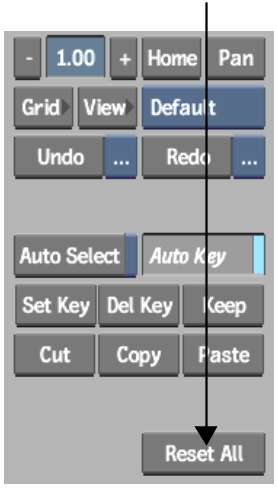
- Optional: Click Reset All, and then Confirm
to reset ReGrain to the default settings.
- By default, the result clip appears.
You can also view the front clip by selecting Front from the View
box.
- To view the front and result clips simultaneously,
and to speed up interactivity while defining the ReGrain parameters,
use the crop box. See
Defining the DeGrain and ReGrain Area.
To access ReGrain from Batch:
- Drag a ReGrain node to the Batch desktop.
- Parent the output to which you want to
add grain to the front clip input socket of the ReGrain node.
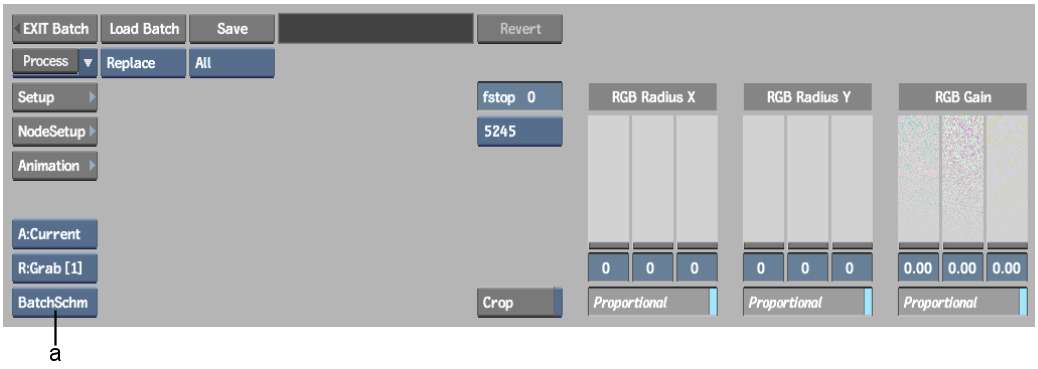
- Select the ReGrain node.
The ReGrain menu appears.
- Press Alt+2 to
select the 2-Up viewport layout.
With the viewport on
the left set to display the front clip and the viewport on the right
set to display the result clip, you can better track the effects
of your changes against the front clip.
- You can also use the crop box to view
the front and results clips simultaneously, and to speed up interactivity.
See
Defining the DeGrain and ReGrain Area.
- Lastly, use the reference buffer to store
intermediate results as you set the grain parameters. See
Storing Reference Frames in the Reference Buffer.