Show in Contents

Add to Favorites

Home: Lustre

VTR Emulation

Video Capture and Video Playout

Playout and GPU Acceleration

Writing Telecine-Style
Tape
The
Telecine feature allows you to emulate grading with telecine tape.
The original source timecodes are written to tape, and each shot
is separated by a black sequence of duration equal to Black Length
value field.
Before you can use the
Telecine feature, you must configure the VTR and the breakout box.
To configure the VTR:
- Set the VTR's timecode configuration
to:
- Record run
- Preset Timecode Generation
NoteThe timecode data
is transferred through the RS-422 connection.
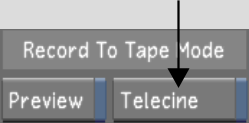
To output telecine-style tape:
- Enable Telecine prior to starting the
playout operation.
- Sort the timeline in C mode (with or
without Head/Tail) using the C-Mode option found in the Editing
> Assemble > Sort Modes menu.
- (Optional) To resize rendered 2K
or HD content to NTSC or PAL resolutions:
- Select an NTSC or PAL raster.
- Enable the Pulldown option.
- Click Assemble once, and then a second
time to confirm the action.