Show in Contents

Add to Favorites

Home: Lustre

Recording in Record Mode

Playing Out to a VTR

Writing Telecine-Style Tape

VTR Emulation
When
configured to emulate a VTR, Lustre can be controlled, using
an RS-422 interface, by a third-party application or device. You
control Lustre VTR emulation from the application or device
that treats Lustre as a VTR device. Lustre supports SD and
HD emulators.
The RS-422 commands that
you can use for VTR emulation are summarized as follows:
- Play
- Stop
- REW
- FF
- PREROLL
- PREROLL TIME PRESET
- SHUTTLE
- JOG
- VARPLAY
|
- Reset TC IN
- Reset TC OUT
- Mark TC IN
- Mark TC OUT
- Set TC IN
- Set TC OUT
- AUTO mode ON
- AUTO mode OFF
|
- TC IN+
- TC IN-
- TC OUT+
- TC OUT-
- CUE to (given) TC
- CUE to TC OUT
- EDIT channels preset
- Eject
|
NoteUnless otherwise
configured by the controller device, the pre-roll time on the Lustre VTR
emulator defaults to seven seconds with each video initialization.
To operate Lustre as a VTR:
- Connect Lustre to the breakout box
by doing one of the following:
- If Lustre is running on the IBM® IntelliStation® Z Pro 6223 or the HP® xw8400, connect to the
B port on the DVS Centaurus breakout box.
- If Lustre is running on the HP xw8600,
connect to the B port on the AJA breakout box.
- Connect the master application or device
to Lustre on the patch panel using a straight pin-to-pin serial cable.
A cross-cable will not work.
WarningSave your grade before
editing your project, or you will lose any unsaved work.
- Launch Lustre and navigate to the
Engineering page of the Project Management settings (See
Engineering Settings).
- Enable VTR Emulator.
- Use the Offset in Frames slider to set
the number of frames you wish to shift ahead as footage is transferred
from the controlling device to Lustre. Enter a negative number
of frames to shift the clip backwards.
- Click Save Project.
- Click Editing, and then click Playout
to display the Playout menu.
- Select a raster for playout. See
Selecting a Raster for Playout.
- Prior to playout from the VTR emulator,
perform the following tasks:
- Add a header of at least five seconds
to the start of the Storyboard.
- Verify that the start Timecode begins
at the end of the header, and not at 00:00:00:00. This is necessary
because the Lustre VTR emulation does not provide a pre-roll
outside of the boundaries of the existing Storyboard.
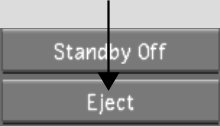
To disable VTR emulation:
- Click Eject.
- To re-initialize, either switch between
the Editing Capture and Playout menus, or re-select the DVS raster.