Setting Up the Stereoscopic Footage


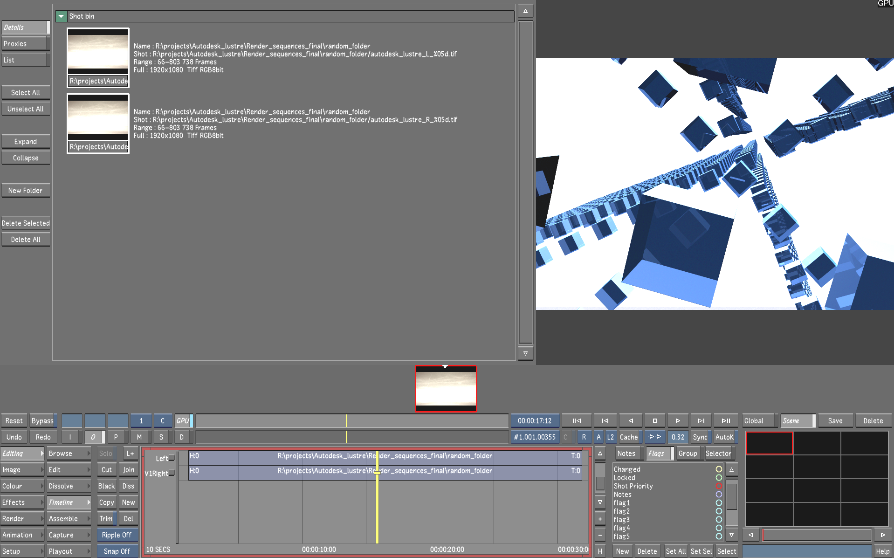
After you have enabled the Stereoscopy feature, you need to load the stereoscopic footage and make sure that each layer is assigned to the correct eye.

To load the stereoscopic footage to the timeline:

  1. Drag your stereoscopic footage from the folder location to the Shot bin. See, Loading Shots into the Shot Bin.
  2. Click Editing in the main menu and then click Timeline.

    The Timeline menu is now displayed.

  3. Click L+ to add a second layer to the timeline.
  4. Drag and drop your shots from the Shot bin to the timeline. Make sure to drag the Left Eye shots to one layer and the Right Eye shots to the other.
    NoteIn Stereoscopy, there is a limit of one layer for each eye.

    Show small imageShow large image

  5. Save the new cut. See Saving a Cut.

Assigning the Left and Right Eye Layer

Once a stereoscopic timeline is created, you need to make sure each layer is assigned to the correct eye. You must assign the layer to the correct eye for the following reasons:

To assign the Left and Right Eye Layer:

  1. Place the timeline focus point on the layer that has the Left Eye footage.
  2. Press Alt+L.

    The layer is now assigned to the Left Eye.

  3. Move the focus point to the other layer.
  4. Press Alt+R.

    The layers for the Left and Right Eye are now assigned and the layer names are now V1Left and V1Right.

    Show small imageShow large image