Show in Contents

Add to Favorites

Home: Lustre

Working with Templates

Working with Templates

Editing a Project Template

Creating a Project Template
When you are choosing
your project settings, you can create a template for your future
projects.
From the Project Template
group, within the Project settings page, you can complete the following:
- Create a new project template.
- Create a new project template from an
existing project.
- Create a new project template from an
existing project template.
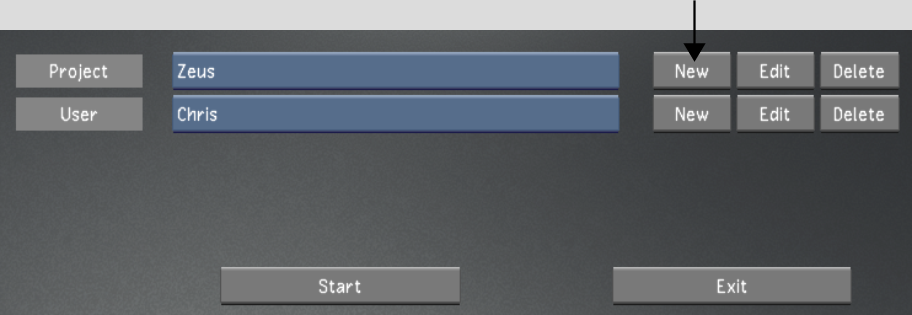
To create a new project template:
- Do one of the following:
- From the Main menu, click Setup, then
Settings, and then click New in the Project group.
- From the Lustre splash screen, click New
in the Project group.
- Configure the settings for the template.
Use Reset to reset all settings, from every menu, to their defaults.
| Select: |
To configure: |
| Project |
The name and location of the project. See
Project Settings.
|
| Calibration |
Default system calibration settings and define the default
Print LUTs for a project. See
Calibration Settings.
|
| Rendering |
Default rendering settings for a project. See
Rendering Settings.
|
| Engineering |
Default video and graphics settings for a project. See
Engineering Settings.
|
| Network Rendering |
Default Backburner/Burn, Slave Render, and Wiretap directory
paths and settings for a project. See
Network Rendering Settings.
|
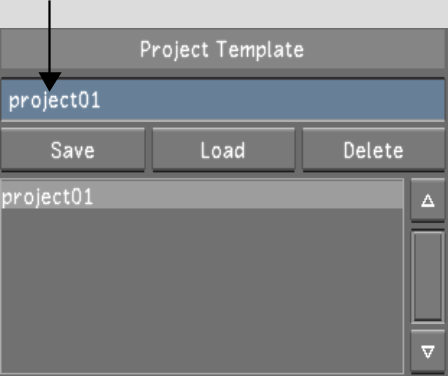
- When you are done editing the settings,
click Project, and enter a project name in the Project Template
field.
- In the Project Template group, click
Save.
- To exit, click Exit Project.
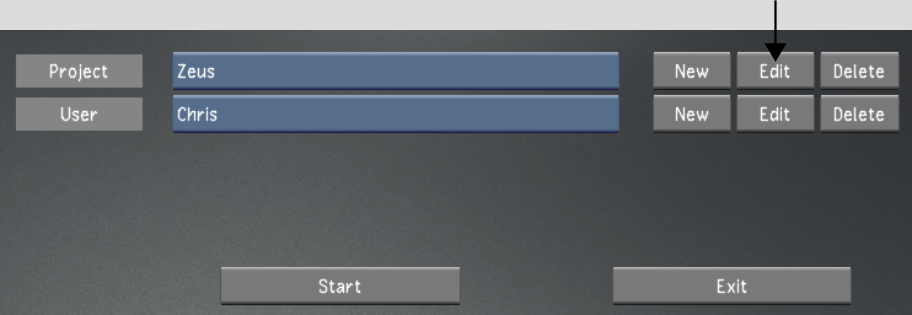
To create a new project template from
an existing project:
- Do one of the following:
- From the Main menu, click Setup, and
then Settings. In the Project group, select the baseline project,
and then click Edit.
- From the Lustre splash screen, select the
baseline project, and then click Edit in the Project group.
- Configure the project. Use Reset to reset
all settings, from every menu, to their defaults.
WarningRename the new project, or you will overwrite
the original project's settings with the new settings.
| Select: |
To configure: |
| Project |
The name and location of the project. See
Project Settings.
|
| Calibration |
Default system calibration settings and define the default
Print LUTs for a project. See
Calibration Settings.
|
| Rendering |
Default rendering settings for a project. See
Rendering Settings.
|
| Engineering |
Default video and graphics settings for a project. See
Engineering Settings.
|
| Network Rendering |
Default Backburner/Burn, Slave Render, and Wiretap directory
paths and settings for a project. See
Network Rendering Settings.
|
- Click Project and enter a name in the
Project Template field.
- To save the template, click Save in the
Project Template group.
- Click Exit Project.
To create a new project template from
an existing project template:
- Do one of the following:
- From the Main menu, click Setup, and
then Settings. Select the project to edit, and then click Edit in
the Project group.
- From the Lustre splash screen, select
the project to edit, and then click Edit in the Project group.
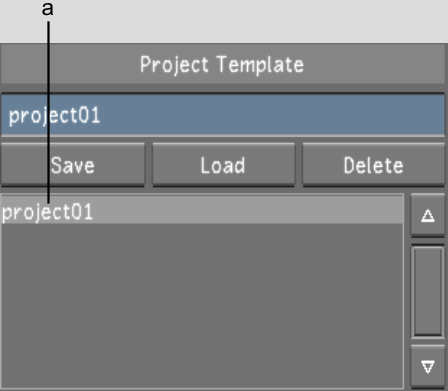
- From the Project Template list, select
a template.
- Click Load.
- In the Project Template field, enter
a new template name, and then click Save.
WarningRename the new template, or you will overwrite
the original template with the new settings.
- Configure the template. Use Reset to
reset all settings, from every menu, to their defaults.
| Select: |
To configure: |
| Project |
The name and location of the project. See
Project Settings.
|
| Calibration |
Default system calibration settings and define the default
Print LUTs for a project. See
Calibration Settings.
|
| Rendering |
Default rendering settings for a project. See
Rendering Settings.
|
| Engineering |
Default video and graphics settings for a project. See
Engineering Settings.
|
| Network Rendering |
Default Backburner/Burn, Slave Render, and Wiretap directory
paths and settings for a project. See
Network Rendering Settings.
|
- To save the template, click Save in the
Project Template group.
- Click Exit Project.