Chapter 12, Colour Grading: Basics
| About Colour Grading | GPU Acceleration | ||
Chapter 12, Colour Grading: Basics |
|||
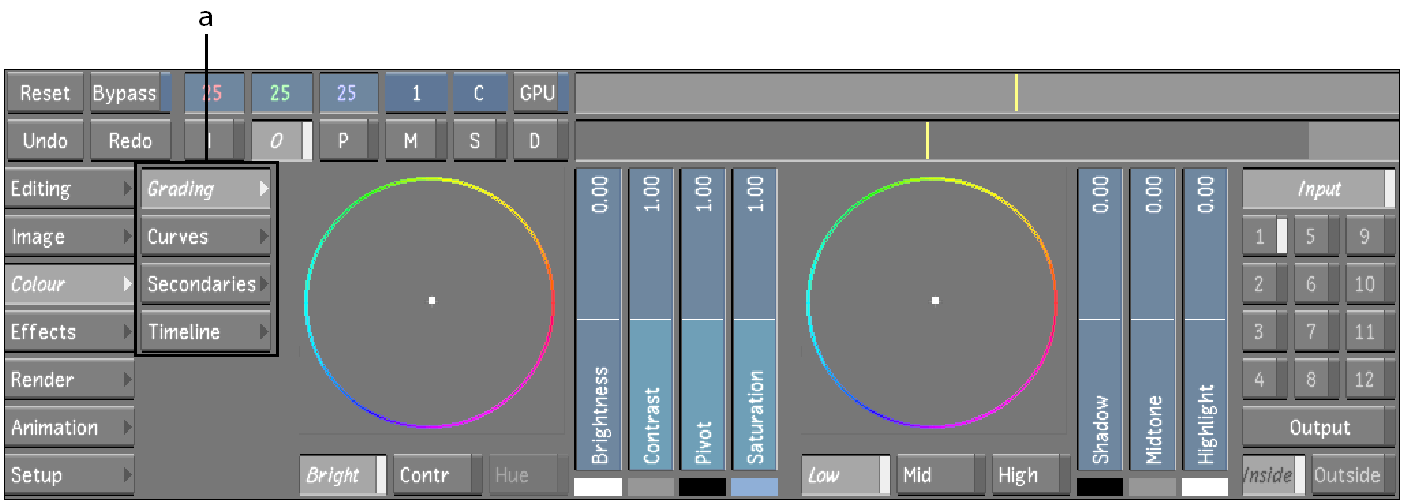
Use the Colour menu to access the Grading, Curves, and Secondaries menus.
In the Main menu, click Colour.
The Colour menu appears.
 "Show full-size image")
|
You can access the following colour grading menus from the Colour menu.
Grading--Create the primary colour grade to colour balance your shots, as well as develop the continuity grade. In Log mode, adjust the brightness, contrast, and saturation across the entire image, or adjust the brightness in the shadows, midtones, and highlights. In Linear mode, adjust lift, gain, gamma, saturation, and contrast across the entire image or in the shadows, midtones, and highlights. You can also clamp minimum and maximum luminance values. Enable the Input button for initial primary colour grading, and the Output button to create the final look.
Curves--Refine the primary or secondary colour grade. Remap colour values for the red, green, and blue channels individually or all together using the RGB curves. Adjust the hue, saturation, lightness, and luminance using the Hue curves. Enable the Input button to refine the initial primary grade, and the Output button to refine the final colour grade.
Secondaries--Define up to 12 secondaries that can then be colour-graded using the Grading and Curves menus. Generate keys that define your secondaries by isolating colour ranges in the image. Create and track geometries to include with, or exclude from, the secondary colour grade.
Timeline--The Colourist's Timeline is a simple user interface that allows the colourist to work in a timeline interface without all the timeline editing tools. In this interface you can work in Normal or Solo mode, add cuts and dissolves, and create a new version of a shot. You do not have access to the trimming tools.