Chapter 5, Monitor Calibration
| Applying Print LUTs for Viewing | |||
Chapter 5, Monitor Calibration |
|||
When you use 3D Mesh LUTs, you apply either the hardware 3D Mesh LUT or software 3D Mesh LUT. The hardware 3D LUT is an interactive viewing LUT that works through the NVIDIA® graphics card. The hardware 3D LUT displays how the colour graded images will look on film stock as you work, without impeding processing speed.
The software 3D LUT is a viewing LUT that can also be applied to the video output (such as a preview monitor). Use the software 3D LUT when you want to view your work on a video monitor--the software 3D LUT will simulate one destination medium on another medium on output. For example, if you want to create a particular film look when you output your colour graded shots to video, you can simulate the film stock on video by selecting the software 3D LUT. When you use the software 3D LUT rather than the hardware 3D LUT while you colour grade, playback speed will slow down as the colour grade becomes more complex.
Hint: To output the colour grade with the 3D LUT to video, render the images with Render Viewing On. The 3D LUT will be included in the render without slowing down playback speed.
Save the 3D LUTs in the C:\Program Files\Autodesk\lustre 2009\lut folder if running the Windows version of Lustre, or in the /usr/Autodesk/lustre2009/lut directory if running the Linux version of Lustre.
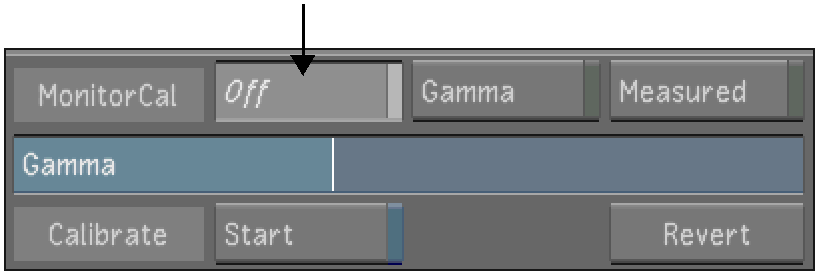
In the Calibrate menu, click Off to disable existing monitor calibration settings.
 "Show full-size image")
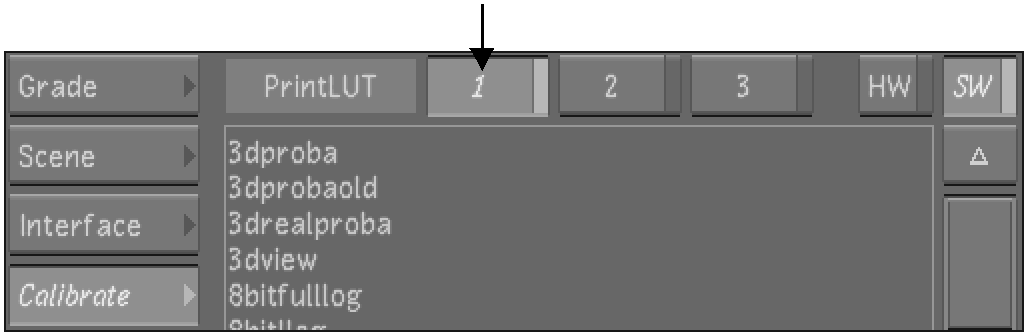
Click 1.
 "Show full-size image")
Enable HW for hardware or SW for software.
In the Print LUT list, select a 3D LUT.
 "Show full-size image")
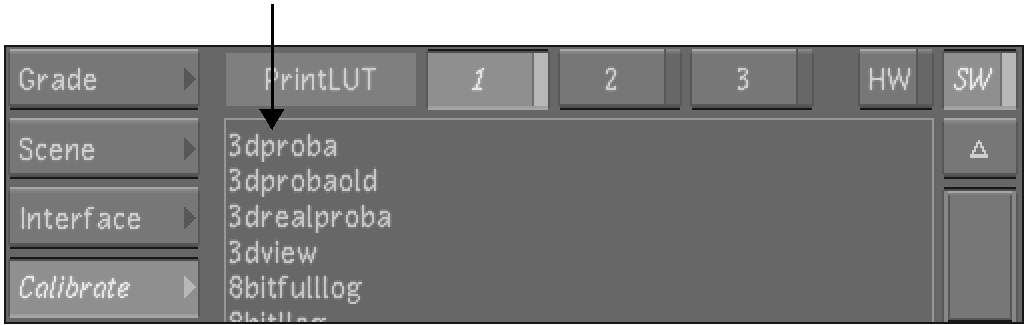
The selected 3D LUT is assigned to L1.

 "Show full-size image")
If necessary, repeat steps 3 and 4 to assign the other 3D LUT to L2.
Hint: For real-time playback with a 3D LUT applied, enable GPU acceleration by clicking the GPU button or pressing Y. See GPU Acceleration.