
Appendix A, The Autodesk Control Surface
| Performing Colour Grading |  |
 |
Generating Keys |
Appendix A, The Autodesk Control Surface |
|||
When the Curves menus is enabled, you can use the Function panel to:
Modify Hue and RGB curves either after the initial primary colour grade, or after the addition of any Lustre Sparks® effects.
Adjust the Hue, Lightness, Saturation, and Luminance curves separately.
Modify the entire curve uniformly or modify individual vertices for RGBCMY channels (red, green, blue, cyan, magenta, and yellow).
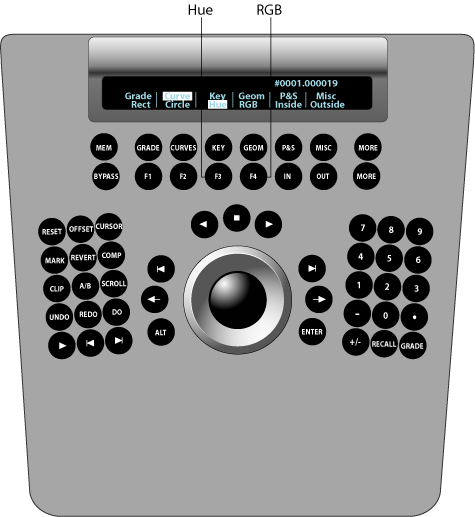
Press Curves on the Navigation panel.
The In Primary, Out Primary, Hue, and RGB options are activated.

Do one of the following:
Press the F1 option button to indicate that you are working on the initial primary grade.
Press the F2 option button to indicate that you are working on final curve modifications.
Do one of the following:
Press the F3 option button to work on Hue curves.
Press the F4 option button to work on RGB curves.
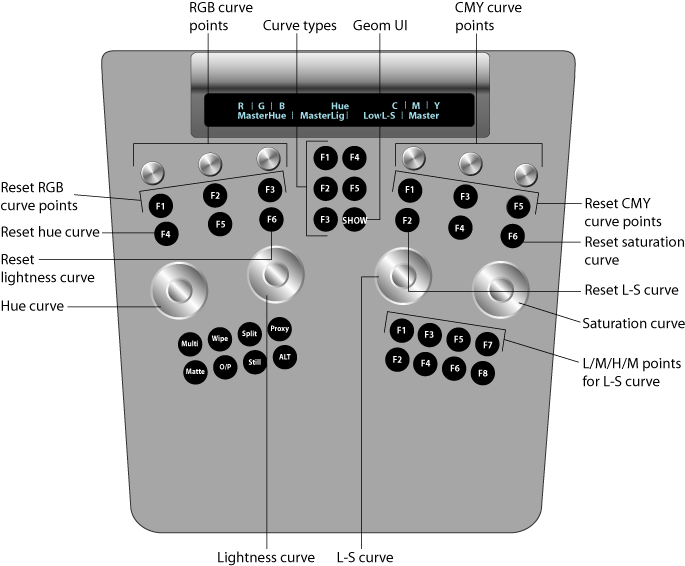
On the Function panel, use the following controls.

| Use: | To: |
| Wheels | Make overall changes to curves. Wheel 1=Hue curves Wheel 2=Lightness curves Wheel 3=L-S curves Wheel 4=Saturation curves To reset a wheel, press the button above it. |
| Knobs at top left and top right | Individually modify RGBCMY curve points.Knob 1=Red Knob 2=Green Knob 3=Blue Knob 4=Cyan Knob 5=Magenta Knob 6=Yellow To reset a knob, press the button below it. |
| Buttons in centre column | Select the type of curve to be modified using the RGBCMY curve points. F1=Hue F2=Light F3=Saturation If you press the F1 button when working with RGB curves, you are toggled to Hue curves. |
| First row of buttons at bottom right | Select the low point, mid point, high point, or all for the L-S curve. F1=Low F3=Mid F5=High F7=Master |
| SHOW button | Toggle the geometry wireframe on or off. |
  |