


In the next steps, you create a cluster deformer on the duplicated face (target object) to reshape the expression into a smile. The cluster deformer on the target object will be used to change the unsmiling baseFace (base object) into a smiling face.
A cluster deformer creates a set whose members consist of selected points (CVs, vertices, or lattice points). You assign a percentage weight to each point, indicating how much you want each point to be affected by any translation, rotation, or scale of the cluster set. When you transform the cluster, the points are transformed according to the percentages you have specified. A cluster is useful for stretching, moving, or compressing part or all of a surface.
Next, you’ll select the smilingFace vertices as shown in the illustration, which are roughly the vertices at the chin, cheeks, and lips, but not the nose.
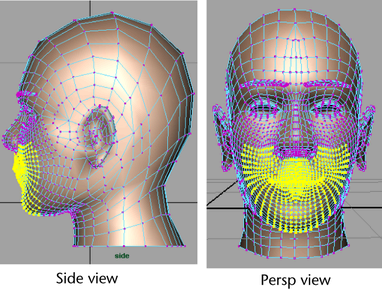
The region of selected vertices does not need to be exact, although you want to avoid selecting vertices at the back of the head inadvertently. Also make sure you don’t inadvertently miss a few vertices in the region you do want to select.
The objective is to select all vertices where a smile might deform the face. You might want to look in a mirror to see which parts of a face move while smiling. It’s better to select too many vertices than too few. It’s easier to work with too many vertices than too few.
This puts the vertices into a cluster—a set of points you can move as single entity. The cluster’s handle appears in the view as a C icon.
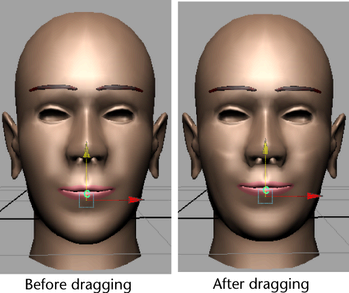
The cluster set on smilingFace should be slightly higher than the cluster on the original face. This will become the basis for the blend shape deformer.