


 -click the file and select Import Maya File dunk1.ma from the menu that appears.)
This loads the dunk1 character (named MocapExample by default) into your scene.
 > Edit > Definition > Rename and rename the character as DunkSource.
Maya's basic mocap examples are located in the root folder (C:/Program Files/Autodesk/Maya2014/presets/mocap/examples/) and already have a HumanIK skeleton definition that can be used to retarget animation onto your HumanIK defined characters.
-click the file and select Import Maya File BBallPlayer.ma from the menu that appears.)
This loads the BBallPlayer character into your scene. This character will be your target character, receiving retargeted animation.
> Edit > Definition > Rename and rename the character as DunkTarget.
To retarget from the source character to the target character
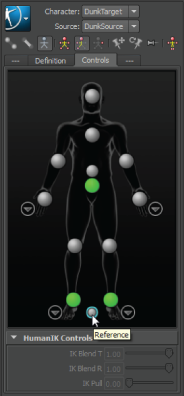
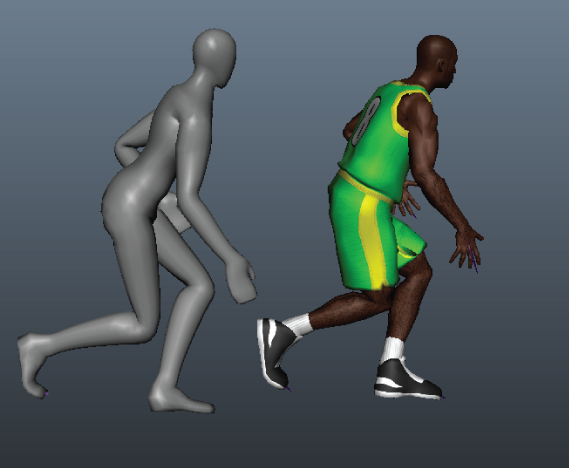
The target character snaps to match the position of the source character, and retargeting controls appear in the Controls tab.
To see the retargeted result clearly, DunkTarget needs to be offset from DunkSource.
 from the Toolbox.
A move manipulator icon appears over DunkTarget's Reference object in the scene. Drag the manipulator until both characters are no longer overlapping.
In the next section you learn how to adjust the retargeted animation to account for size discrepancies between your source and target characters.
 Except where otherwise noted, this work is licensed under a Creative Commons Attribution-NonCommercial-ShareAlike 3.0 Unported License