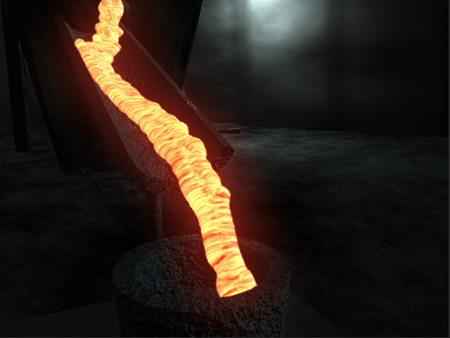
Assigning a texture to the mesh gives it the orange glow of molten metal when the scene is rendered. The material that you assign is made from an orange blinn shader with a fractal texture.
When assigned to the mesh, the textures use the UVW coordinates generated by the Uvw Per Vertex attribute of the nParticle object.
With Uvw Per Vertex on, Maya generates UVW texture coordinates when you convert an nParticle object to a polygon mesh. The texture coordinates let you map a texture to the surface of your output mesh.
The mesh turns black to indicate that the material is assigned to it. To see the results of the material, you render a single frame of the simulation.
Rendering single frames of your simulation let you observe how attribute adjustments affect its behavior and appearance. For these renders, use the Maya Software render with default settings. With these settings, your frames will render quickly, allowing you to move on to the next section of the lesson. If you prefer, you can use mental ray for rendering.
 icon.
icon. 
You can adjust the material attributes such as Reflectivity and Glow Intensity, to get the desired look of the molten metal.
You can also improve the quality of the rendered frame by changing the render settings.
 icon to open the Render Settings window.
You have now created a realistic simulation of molten slag flowing into a tub. This concludes the section on creating the slag flow. In the next lesson, you create a fluid to simulate smoke and flames coming off the molten slag.
 Except where otherwise noted, this work is licensed under a Creative Commons Attribution-NonCommercial-ShareAlike 3.0 Unported License