The Resize tool lets you change the resolution of an image and its frame bit depth when working with images of different resolutions.
The Resize tool UI is divided into three areas:
Use this area to select format, resolution, image and pixel aspect ratios, as well as bit depth of the destination image.

| Select: | To: |
|---|---|
| Format | Select from a list of many standard resolutions, as well as a Custom option that you can use to specify non-standard resolutions. |
| Width and Height | Display the frame width and height of the selected resolution preset. If you select Custom from the resolution presets box, use these fields to enter the frame width and height values you want to use. |
| Image Aspect Ratio | Change the image aspect ratio. |
| Pixel Aspect Ratio | Change the pixel aspect ratio. |
| Depth | Select the output depth. |
Use the Reference area to set crop box properties.

| Select: | To: |
|---|---|
| Color | Change the color of the crop box. By default, the crop box is red. If there is a lot of red in the image you are resizing, you may want to change the color of the crop box to see it better. Clicking the color pot will take you to the color picker where you can set desired color for the crop box. |
| X and Y | Change the X and Y position of the crop box. |
| Width and Height | Change the width and height of the crop box. You can either type the dimensions into the respective Width and Height attribute value fields, or you can grab the edges of the crop box with the cursor and resize. |
| Fit To Source | Fit the crop box to the source image. |
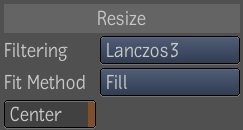
Use the Resize area settings to define the destination format into which the source sample is fit.
The Resize area has the following parameters:

Pictures often appear fuzzy when scaled to a different size. The fuzziness of an image is controlled by two processes: resampling and filtering.
The filtering processes attempt to smooth the transformed pixels. When an image is being resampled to a different resolution, the old pixel map needs to be interpolated to a new one. This requires some form of image interpolation and a number of interpolation methods can be used.
| Use: | To: |
|---|---|
| Filtering | Select a filter type. You can choose from; Box, Triangle, Bell, B-spline, Lanczos3, or Mitchell. These filters range in quality from the Box filter being of the lowest (unsuitable for further processing, but with the least amount of processing time), to the Mitchell filter producing the best possible results. |
| Fit Methods | Select a fit method. You can choose: Fill, Crop, Letterbox, or Crop Edges. If you select Letterbox or Crop Edges, you can also select or deselect the Keep Aspect parameter. |
| Center | Select to center the destination resolution. |
Animate the position of the crop box to pan and scan a 16:9 composition to a 4:3 format. Pan and scan is a technique widely used for resizing 16:9 compositions to a 4:3 resolution when the area of interest in the shots is to one side of the 16:9 frame. You can follow the area of interest in the shot by animating the crop box along the X-axis.
To pan and scan a 16:9 composition to a 4:3 composition:
In this procedure, resize a 16:9 composition to a 4:3 destination resolution using the Letterbox fit method.
To resize a 16:9 composition from source to a 4:3 destination resolution using the Letterbox fit method:
 Except where otherwise noted, this work is licensed under a Creative Commons Attribution-NonCommercial-ShareAlike 3.0 Unported License