Shader Types
There are four shader types: Standard, Simple, Shadow Matte, and No Shade.
To select a shader type:
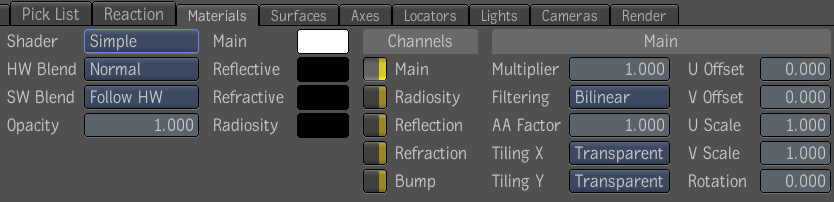
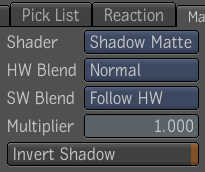
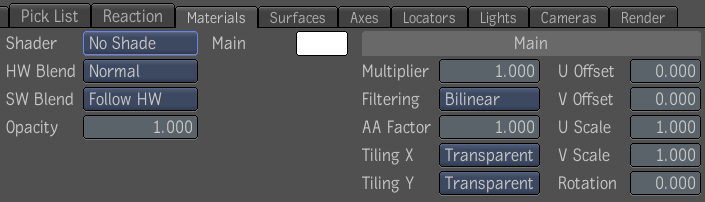
- In the Materials UI, select a shader:
- The full range of parameters for creating diverse 3D effects using lights and cameras.
- A subset of Standard shader parameters. It does not consider lights in the scene, but you can create lighting effects using
environment maps.
- Used to blend shadows into a scene. By adding objects to a scene, you can create realistic shadow effects.
- Lets you set parameters and texture mapping for the main material channel only. You rely on the lighting effects in the source
image to provide illumination.
Basic Shading Parameters
The basic shading parameters let you set a layer's opacity. Depending on the shader type selected, you can also set the refractive
index and surface glossiness.
To set basic shading parameters:
- Enter a value for the object's opacity, refractive index, and glossiness.
-
-
Sets the transparency for the layer. Values are measured in percent. A value of 100 is opaque, a value of 0 is transparent.
If you want to create a transparent surface, such as glass, a low value (10) will yield a more convincing result than 0.
Note Transparency affects the visibility of a layer's other attributes.
-
-
Sets the level of glossiness for the layer, which affects the specular highlights created when a light shines directly on
a layer. A glossier, more reflective surface yields a smaller, sharper highlight. A less glossy surface has a highlight that
is more diffuse or blurry. Glossiness is available with the Standard shader only. Values range from 0 to 1, with a value of
1 being completely reflective. In this case, you would not be able to see any of the objects other surface properties, so
glossiness should be set to less than 1.
Setting Material Colors
You can set color factors for each texture channel available for the type of shader you select. If you are working with a
Standard shader, you can also set color factors for ambient and specular lighting effects. The colors you set are multiplied
with the colors of the input source image connected to that channel. The Shadow Matte shader has no color factors. For a description
of material color settings, see Material Color Settings
NoteYou can choose to add a layer without a source to your composition. For example, if you want to add a colored ball to your
scene, you can simply create a layer and set its color in the Materials tab. In this case, the main color would be the color
you set.
To set material color values:
- Click the color pot of the channel that you want to set a color.
The Color Picker is displayed, so you can set color values—see Color Picker.
Using Texture or Environment Maps to Control Surface Attributes
The Main texture channel defines the surface's general appearance, but if your main texture is not enough to give you the
look you want, you can add more texture maps. Each Material node has five texture channels that you can use to apply texture
and environment maps to refine the appearance of an object's surface. You can set parameters for each channel.
The Main and Bump texture channels let you wrap and position a texture on the surface. By default, the image is clamped to
the surface. You can then use placement parameters to position the source image on the surface and apply tiling effects.
The Radiosity, Reflection, and Refraction channels let you apply environment maps to your surface object. The environment
maps use their source image to surround the surface with a virtual sphere to simulate an environment, which shows up as reflections
on the surfaces of objects with reflective properties. The environment map always covers the sphere exactly once. You can
transform your object and see the effects of the environment map change dynamically. Using environment maps is a fast and
inexpensive way to achieve highly realistic lighting effects.
NoteMaterial nodes in the Group Schematic always show all five input tabs. However, the number of active input tabs depends on
the channels available for the selected Shader type.
To connect a source image to a texture or environment map channel:
- Do one of the following to display the Group Schematic:
- In the Schematic view, double-click the Reaction tool.
- In the Schematic view, right-click the Reaction node and select Edit Group.
- Connect a source image node to a channel tab on a Material node. To identify the nodes, pause over a material node to see
a tooltip with the node name.
| Material Texture Channel |
Description |
| Main |
The main channel is used to apply a source image as a texture map on a selected object's surface. You can position the material
on the surface using the UV placement controls, and tile the image in U and V.
|
| Reflection |
A reflection map uses the source image to create realistic reflections. You can use the color factor to set areas and the
degree of reflectivity for the material. You typically set a grayscale color value, with white being completely reflective,
and black having no reflectivity. You can, however, achieve tinted reflections by set setting a color.
|
| Refraction |
A refraction map is an environment map that can be used to simulate how light traveling through a refractive, transparent
material is distorted.
|
| Radiosity |
The radiosity map uses the source's color and luminance values to add radiosity effects to the layer surface. |
| Bump |
A bump map is usually a different image that you specify as a source for a bumpy or textured appearance on a surface. It is
sensitive to light sources. Its RGB (when using an RGB image, it is a normals map) or luminance values are used to simulate
relief on objects by perturbing the surface shading according to an image map. The geometry is not affected.
|
- To exit the Group Schematic, double-click anywhere in the Schematic.
Note When using an RGB image as an input to the Bump channel, the RGB values map to XYZ when calculating the effects of light
on the surface normals.
Tip Black and white or grayscale images are easy to work with when adding a bump map, as you can quickly identify how the bump
map will appear on the target surface. Black areas create ridges, and white areas create indentations.
- Only the Standard Shader considers lights in the scene.
- Using environment maps adds lighting effects to the associated objects only.
To set texture and environment map parameters:
- In the Materials UI, select a layer from the Layer Editor.
- Select the Simple or Standard shader.
- Under Channels, select a channel: Main, Radiosity, Reflection, Refraction, or Bump.
- Adjust the parameters to control image brightness and texture quality, and in the case of the Main and Bump textures, specify
how the texture is positioned on the object. For a list of parameters, see Shaders Parameters
 Except where otherwise noted, this work is licensed under a Creative Commons Attribution-NonCommercial-ShareAlike 3.0 Unported License