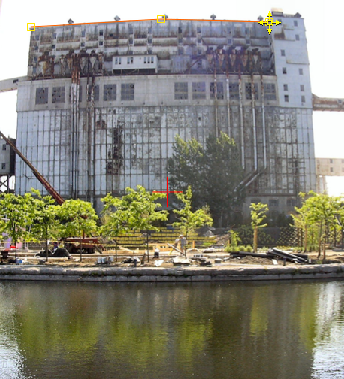
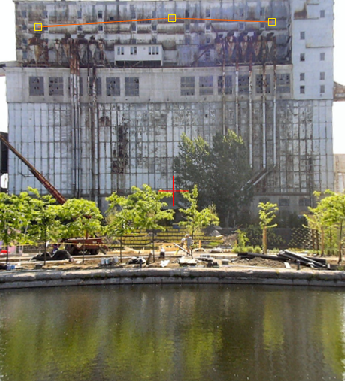
The Lens Distort tool lets you create or correct lens distortion that may be present in image sequences.
Barrel distortion is associated with wide angle (or minimal zoom) lenses. It causes the images to appear slightly curved outward like a barrel. You can notice this when you have straight features close to the image's peripheral sides.
The Lens Distort tool has the following parameters:

| Use: | To: |
|---|---|
| Mode | Select either lens correction or distortion. This affects all other parameters. The other parameters will be considered either in a distortion or in a correction work flow. The distortion transformation is exactly the inverse of the correction, so keeping the same parameters and putting back to back distortion plus rectification will give back the original result, but filtered twice at each transformation resulting in possible degradation in image quality. |
| Magnitude | Set the first parameter (k1) of the lens distortion equation: rd = r + k1 * r^3 + k2 * r^5. |
| Adjustment | Set the second parameter (k2) of the lens distortion equation: rd = r + k1 * r^3 + k2 * r^5. |
| Anamorphism | Characterize anamorphic asymmetry. Note that this has nothing to do with the pixel aspect ratio of the captured image. |
| Center | Set the X and Y coordinates of the center of the distortion. Those parameters are expressed in pixels. The lens center can also be changed by clicking directly in the player. The center manipulator is always active in the player. The look of the manipulator is a cross. The cross can be manipulated by selecting it and moving it. |
| Height | To determine the region where the lens distortion or correction is applied. This parameter is initialized to the composition height. |
| Fit Source | To set the height input to the input height.This parameter is needed to be able to perfectly inverse a lens correction. |
The following are common use cases for lens distortion or correction:
Analysis of radial distortion computes the magnitude and adjustment parameter from a three point spline created in the player to identify distortion. The analysis is only available when the lens mode is set to “Correct”. All parameters except the magnitude and adjustment are used to compute the new magnitude and adjustment. The magnitude input will be set at the current frame when the analysis is finished. Note that only one spline can be created at the time. The spline is not animatable.
To analyze radial distortion with the spline tool:


The Lens Distort tool has an Output tab with the following parameters:
| Use: | To: |
|---|---|
| Crop | Change the size of an image—see Cropping and Filtering the Output. |
| Filtering | Smooth the transformed pixels—see Cropping and Filtering the Output. |
 Except where otherwise noted, this work is licensed under a Creative Commons Attribution-NonCommercial-ShareAlike 3.0 Unported License