


Rendering the tracked image
sequence
After you have created and checked the quality of the 3D tracking in the Workspace, you can render the scene in a video format to further check its quality. You can also export the tracked sequence to a file format that you can open in your favorite 3D animation or compositing program.
To render the tracked sequence
The Render Setup window appears.
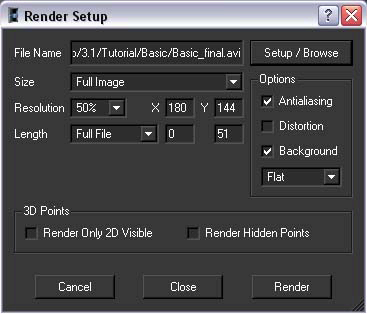
The Render window appears, displaying your rendered sequence with 3D cones composited on your original image sequence. With perfect tracking, the 3D cones should appear as if they were part of the scene. Otherwise, you would notice slight discrepancies between the motions of the real scene and the 3D elements.
Now that you have automatically tracked a PAL video sequence and verified it by rendering it, you can export the results to a file that can be opened in your favorite animation or compositing software.
 icon.
icon.
For example, to open your tracked image sequence in Maya, select Maya (*.ma).
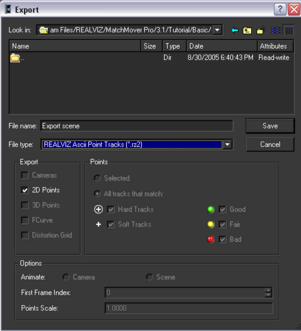
The image sequence is exported to the specified file format for use in your 3D animation or compositing program.