Lesson 1: Create and set
up a muscle object
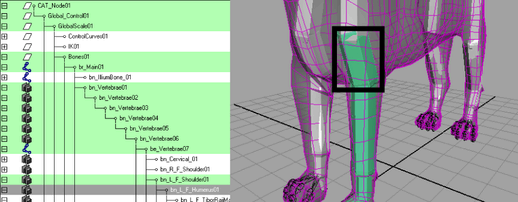
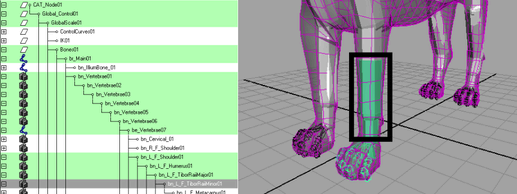
This scene contains a quadruped rig with its joints converted to have capsules. You can use the Display Layer Editor to show and hide the skin of the model.
The quadruped rig is currently lacking a muscle structure. This lesson shows you a workflow example using the Muscle Creator to add muscles. The Muscle Creator lets you not only create and mirror muscles, but also provides controls to sculpt and shape them so they move in a realistic fashion.
The Muscle Creator window appears. The top half of the Create tab contains controls that let you set the name of your muscle, the number of controls/cross sections, the number of segments around your muscle, and the joints to which the muscle is attached.
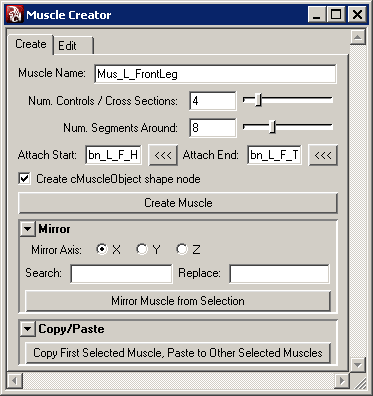
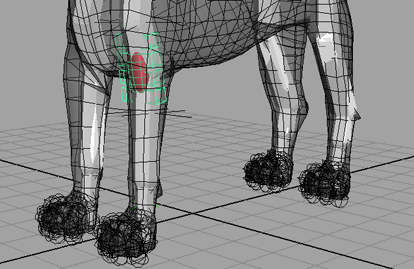
The new muscle is attached to the joints you specified in the Attach Start and Attach End fields.
To see the muscle clearly, you may want to change your scene view to wireframe. The muscle is primarily comprised of a NURBS surface, two attach points at each end of the muscle, and a series of cross section controls.
In this lesson you learned how to create a muscle attached to two joints. You can find the completed file for this lesson, Sabertooth_Create_End.mb, in the Maya Muscle Advanced Techniques folder.
Now you are ready to refine and edit the muscles of the saber tooth tiger by setting the pose states and adjusting the locators at each end of the muscle.
 button
in the
button
in the