This example shows you how to use assets, file referencing, the Transfer Attribute Values option and the Publish Child Anchor option to swap between different arms on a robot model.
Consider a robot model composed of various body parts referenced from other files (for more information on Referencing an Asset, see Reference an asset with file referencing). Each of these body parts are encapsulated by a container with appropriate published attributes. Additionally, the top level group within each container is parented into the scene hierarchy appropriately so the robot can be easily posed.
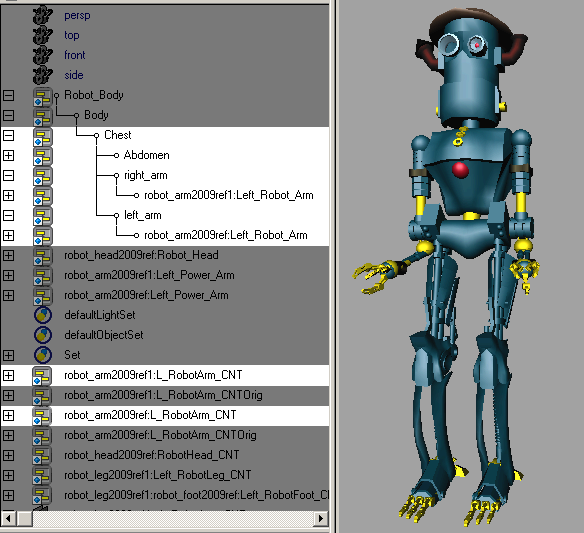
Suppose for a new animation, the robot must lift a heavy crate. However, these arms are too small for the animation.
If you open the referenced arm file, you can see the original arm is encapsulated by the L_RobotArm_CNT. You can model a second, more powerful arm here.
 .
.
All the new arm geometry is automatically created under the L_PowerArm_CNT container.
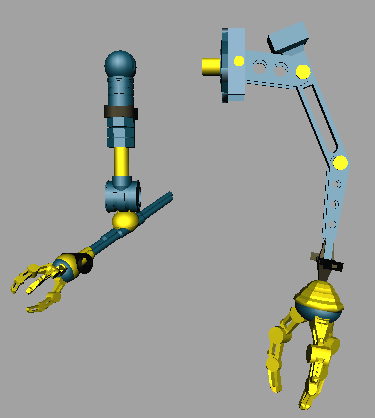
You now have two containers, each encapsulating one arm. However, if you use the Transfer Attribute Values option to switch the arm referenced by the main robot file, you get the following result.
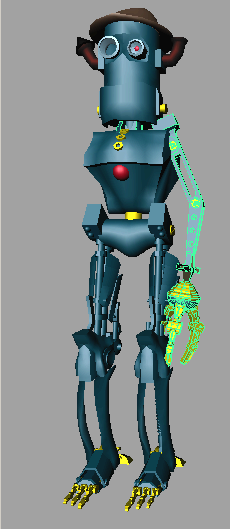
The arms appear on top of one another and are not translated properly. If you take a closer look at the hierarchy, you can see that the referenced arms are no longer located correctly in the character’s hierarchy (they are missing from underneath their respective groups). This is because the main robot scene no longer recognizes any of the nodes under the container (for more information see Assets and the Maya hierarchy).

In order to swap the arms correctly, you must first publish the new arm as a child before you transfer its attributes.
 +
select L_powerArm_CNT.
.
+
select L_powerArm_CNT.
.
The new arm is now organized under the container L_robotArm_CNT while the old arm is organized under the container L_robot_arm_CNTOrig.
Now if you open the main robot file, the robot’s arms are replaced with your new, more powerful looking arms. Since you published these arms as children in their source file, Maya knows they are part of a hierarchy and uses its node information, not its name, to determine its place in the hierarchy.
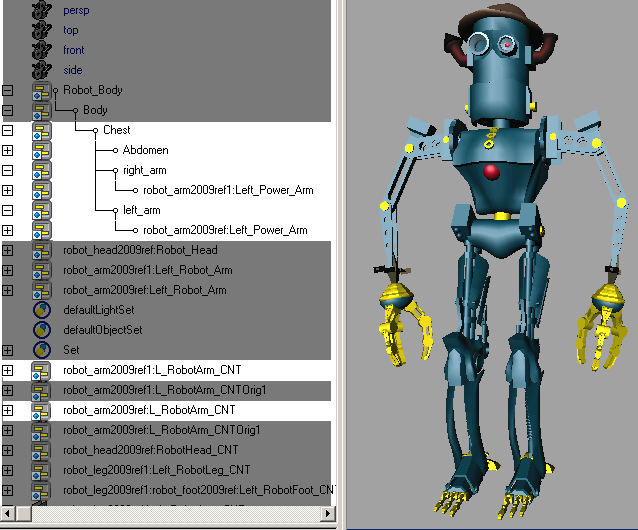
As long as the published attributes of your new arms match the published attributes of the old ones, any associated actions (such as animation) are transferred from the old arms to the new arms.


