In the Move Tool and Rotate Tool, you can select what axes to use.
You can specify the movement axis of the Move Tool in additional ways:
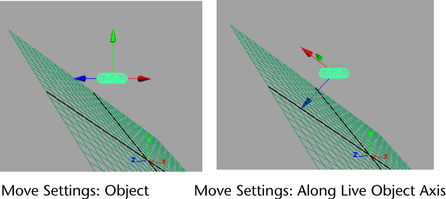
You can set the Move Tool to move objects along the axis of a live object. Most commonly, you would make a construction plane live, but any object can be set live.
Example: moving an object along the axis of a live object
 .
.
The move arrows of the move tool align to the live construction plane.

By clicking and dragging the move arrows, you can now move the torus in a constrained manner: along the surface in two directions or at exact right angles to the surface.
Clicking and dragging the center point of the move arrows moves the object with default behavior (snap to live geometry). For more information, see “ Modify > Make Live” and “ Move Tool”.
The geometry of the live object doesn’t matter; the move aligns to the axes of the live object.
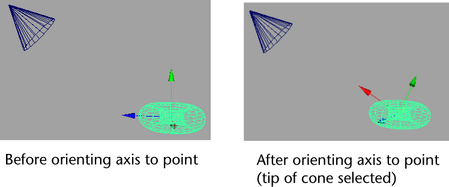
Orient the Move axis towards a point
You can set the Move Tool to move the selected object along a axis defined by selecting a point.
 + w),
select Align Along and then Orient
Axis Towards Point.
The axis of the Move Tool changes.

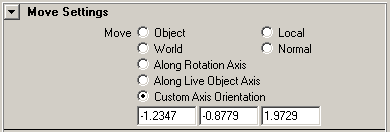
You can see the new axis
settings by opening the Move Tool settings
(double-click the Move Tool icon or select
Modify > Transformation Tools
> Move Tool >  ) and
examining the three boxes under Custom Axis Orientation.
Align the Move axis with an edge or face
You can set the Move Tool to move the selected object along an axis defined by an edge or a face.
 + w),
select Align Along and then Align
Axis With Face or Align Axis With Face.
The axis of the Move Tool changes.
You can see the new axis
settings by opening the Move Tool settings
(double-click the Move Tool icon or select Modify
> Transformation Tools > Move Tool >  ) and
examining the three boxes under Custom Axis Orientation.
You can set the Move Tool to move objects along a custom axis.
 .
.
