Tracking preparation


Which spots should you track? To answer this question, do these steps:

To review a shot and plan for the tracking

  1. Open the Track control panel by clicking the menu on the far left of the control panel and choosing Track.

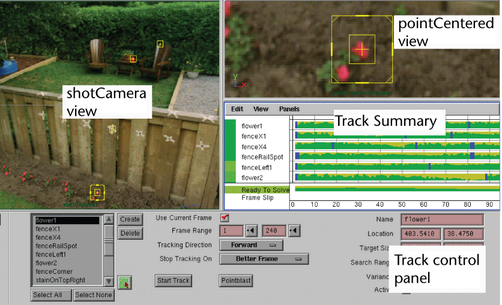
    Above the Track control panel, Live displays preset view panels. The view panels match the needs of tracking. The following illustration labels these panels, shown the way they might look at the end of the lesson.

  2. Play the shot and watch it in the shotCamera view panel. Don’t worry if the playback seems jerky, because you are only getting a rough look at how the camera moves. In fact, you can skip through the frames quickly by dragging in the Time Slider.
    NotePlaying shots can be slow because the images require a lot of memory. To speed up playback, Live has settings for creating an image cache (Setup Cache control panel). Image cache is an allocation of system memory dedicated to storage and retrieval of images so that they play back faster. For this lesson, the default image cache settings usually suffice. If you later find that caching the images appears too slow you can change the Pixel Type from the default RGB setting to Luminance. This will cache black and white versions of the images thereby reducing the amount of data cached and increasing the performance of tracking points in Live.

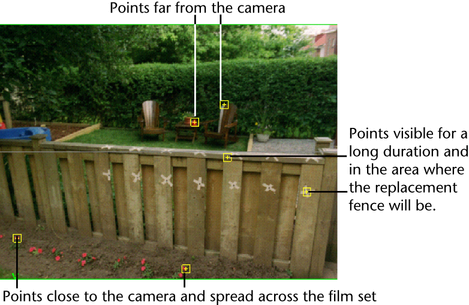
    The following figure gives recommendations on which points to track (you will have a total of 15 in the end). You will track two of the points and import the other points from a prepared file.