Solving the shot
The solver is the part of Live that animates a Maya camera. You rarely obtain a correct solution the first time you run the solver. Once the solver is run, you need to evaluate the solution and make improvements to the track data until the solver can create a correct solution.
The Solve control panel has a different arrangement of view panels than the ones you used for tracking. You will learn about these other panels as you continue with the lesson.
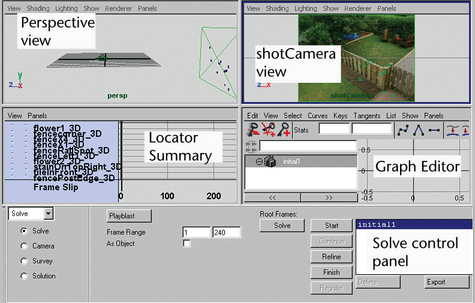
Notice the column of buttons next to the Solve button, with Start at the top and Register at the bottom. These buttons run the solver in stages—the same stages that it performs when you click Solve. Running the solver in stages is only for advanced use; you can ignore these buttons for now.
When the solver finishes, the solution, called solution_rf, appears in the solution list on the Solve control panel. Because you will run the solver several times, Live keeps a list of each solve attempt.
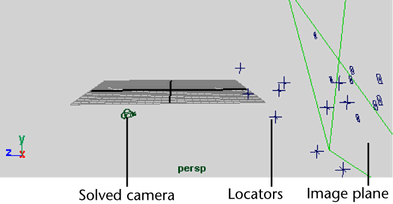
A solution consists of an animated camera and locators, which appear as crossed lines in the perspective view. Locators are marks in the world space that you can use as reference points when modeling. Each locator corresponds to a track point and has the same name, plus the suffix “_3D,” such as fenceCorner_3D.
The following illustration shows an example solution with these parts labeled. Note that images do not appear on the image plane in the perspective view because this view is in wireframe mode.