Show in Contents

Add to Favorites

Home: Autodesk Maya Online Help

Tracking additional points

Lesson 1: Track and solve

Importing tracking data

Deleting tracking data
Because the fence corner
disappears from view in the middle of the shot, you need to skip
several frames and track from where it reappears. First, you need to
remove the bad tracking data where the track box moves off target.
To delete the bad tracking
at the end, you use the Track Summary panel
(the panel below the pointCenteredCamera view).
To delete the bad tracking data
- To see fenceCorner’s tracking graph better,
click the Track Summary panel and tap
the space bar.
- You need to select and remove the tracking
data after frame 52—the last frame still on track. To identify
this frame in the graph, move to frame 52 in the Time Slider. In
the Track Summary panel, a black bar shows the location of frame
52.
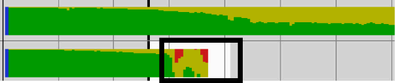
- In the Track Summary panel,
draw a selection box from right to left around the end of fenceCorner’s
graph. Do not select beyond the black bar that indicates frame 52.
Also, be careful to select only the frames for fenceCorner, not
flower1.
- In the Track Summary panel,
choose Edit > Delete Region. Live removes the
bad tracking data from fenceCorner.
Deleting regions where
the track is off target is crucial to successfully solving your
shots. Whenever you find difficulty tracking a point for a specific segment
of frames, consider deleting the tracking data.
- Tap the space bar to shrink the Track
Summary panel.
To continue tracking data in the shot
- Move to frame 143, where the fence corner
reappears in view. In the following steps, you will continue to
track from this frame to the end of the shot.
You’ll skip tracking
a large amount of frames for the fenceCorner point (the ones in
the middle of the graph), which is common practice when creating
track points. In general, track as many frames as possible for each point
and skip, retrack, or delete any frames where the tracker does not stay
on target.
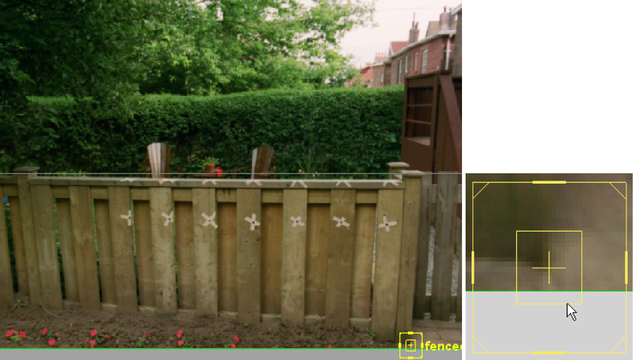
- Reposition the track box over the fence
corner. In the pointCenteredCamera view, align the vertical cross-hair
line with the edge of the fence post and the horizontal cross-hair
line with the bottom of the post.
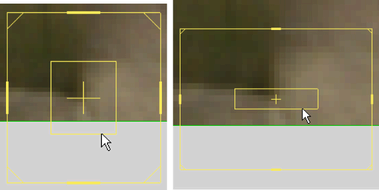
- Shorten the track box’s inner target
box by clicking the inner target box’s bottom edge and dragging
up as shown below. The tracker will not work if the target area
extends beyond the image.
- In the Track control
panel, click Start Track. If the tracker
successfully tracks to the last frame, you’ll see a graph similar
to the following illustration. (The second track area will be mostly
green or all green in the Track Summary.)
If the tracker fails
to create a graph similar to the above illustration, three actions
might have occurred: