


Learning Resources > Tutorials > Getting Started with Maya > Character Setup > Lesson 2: Smooth skinning >
Skin weighting and deformations
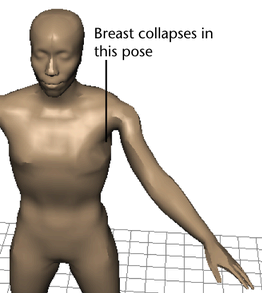
In the next steps, you’ll learn how joints and skin weights influence deformations at Jackie’s chest. In a subsequent section, you’ll improve uneven deformations.
To see how skin weights affect a skin’s deformation
 .
.
White means the skin is maximally influenced by the joint. Black means the skin is not influenced by the joint. Gray means the influence is partial. The lighter the gray, the more the influence.
Each point on the surface is influenced by three joints, as specified by the Max Influence setting in a prior step. However, one or two of the three joints might have so little influence as to be insignificant.
In general, a white region of skin is influenced nearly entirely by the joint selected in the Influence section of the Tool Settings window. A gray region is influenced significantly by one or two additional joints.
The reason the left breast becomes irregularly shaped as you pose the arm is that some joint is exerting too much or too little influence on the breast.