Show in Contents

Add to Favorites

Home: Autodesk Maya Online Help

Creating joints

Lesson 1: Skeletons and kinematics

Creating a skeleton hierarchy

Adding joints to a skeleton
When you bind a character
to a skeleton (described in the next lesson), the skeleton provides
a structure for the character’s skin and prevents the skin from
collapsing as you pose the skeleton.
It’s
useful to add extra joints in areas of the character where you want
the surface to keep its volume upon deformation. In the next steps,
you’ll add ribs to Jackie’s skeleton. Although you will not bind
the character in this lesson, the technique of adding ribs is important
to learn so that when you do bind a character, the skin in the torso
area will not collapse as you pose shoulder and spinal rotations.
The rib joints are for structure only, not for posing the skeleton.
To add ribs to the skeleton
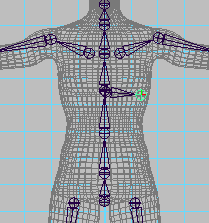
- In the Hypergraph, click the mid_back
joint to highlight the joint in the front view. Remember the location
of the joint in the front view so you can select it later.
- Select
Skeleton > Joint Tool.
- In the front view, click on the mid_back
joint to select it again.
- Click to the side of the joint to add
a rib bone, then press Enter (Windows and Linux) or Return (Mac
OS X).
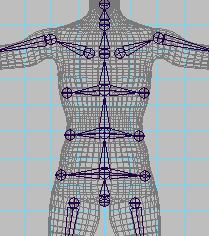
- With the same technique as in the prior
steps, create two more ribs for the left side. The ribs extend from
the mid_back, lower_back, and pelvis joints.
- For easy identification in the Hypergraph,
you can optionally name the ribs as desired. For instance, name
them left_top_rib, left_mid_rib, left_bottom_rib, and so on.
- Mirror the left rib joints to create
ribs for the right side of the skeleton.

