


Learning Resources > Tutorials > Getting Started with Maya > NURBS Modeling > Lesson 2: Sculpting a NURBS surface >
Sculpting a nose
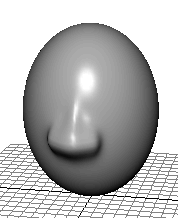
Now you’ll begin sculpting Egghead’s face, starting with a simple nose.
To sculpt a nose for the character

To build up a small area, position the stroke icon there and click the mouse rather than drag. Tumble the view to examine your results after each stroke or click.
If the strokes create a bumpy surface, turn on the Smooth operation and click Flood once or twice to smooth all strokes on the surface. Because Opacity is 0.2, the Smooth operation is subtle. Alternatively, you can smooth a selected region by stroking just that area. It’s common to smooth a surface regularly while using pull and push strokes.
Because there are relatively few isoparms in the nose area, you can only create a simple nose that’s broad and rounded. If you want to create sharper features, for instance, depressed nostrils or sharp ridges, you’ll need to insert isoparms in the nose region. Sculpting a mouth describes how to insert isoparms.