Paint hair textures


Select Hair > Paint Hair Textures to use the 3D Paint Tool to paint maps for baldness, hair color and specular color.

Painting hair textures only makes sense if you are using Paint Effects hair output. With NURBS curve output only you will not see any effect (because the hair curves are not affected by this feature).

To paint hair textures

  1. Create and select the hair system.
  2. Select Hair > Paint Hair Textures, and then select the attribute you want to paint (Baldness, Hair Color, or Specular Color).

    The 3D Paint Tool Settings editor appears. (If you don’t see it, click on the Show or hide the Tool Settings icon in the upper right corner of the Maya window.)

    The Attribute to Paint option in the File Textures section of the 3D Tool Settings window tells you which texture attribute you’ve selected. To change this attribute, you must use the menu items from Hair > Paint Hair Textures.
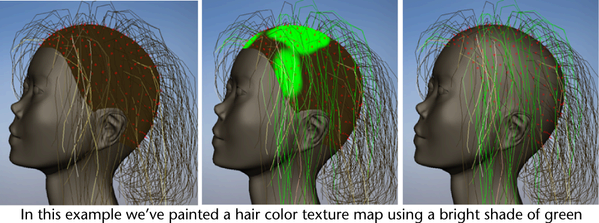
  3. Make sure Update on Stroke is turned on in the File Textures section.
  4. In the Brush section, click on the type of Paint Effects or Artisan brush you want to use. Adjust its scale and width.
  5. Change the color attributes:
  6. Ensure that you’ve set your view to be shaded with hardware-rendered textures (press the 6 key).
  7. Paint the hair surface. As you paint, the selected attribute of the hair is affected at the end of each stroke, but the follicles themselves remain unchanged.
    NoteWhile painting, a temporary shader for painting feedback is applied to the surface. The original shader is restored on exiting the tool. Simply re-entering the 3D Paint Tool will not resume painting. You must always invoke the tool from the Hair > Paint Hair Textures menu.