Show in Contents

Add to Favorites

Home: Autodesk Maya Online Help

Splitting a surface in polygon proxy mode

Lesson 1: Modeling a subdivision surface

Deleting polygon faces

Extruding polygon faces
Next, you’ll extrude
faces to create fingers for the hand.
To extrude the polygon faces to create
fingers
- In
a perspective view, right-click LeftHand and select Face from
the marking menu.
This lets you select
faces.
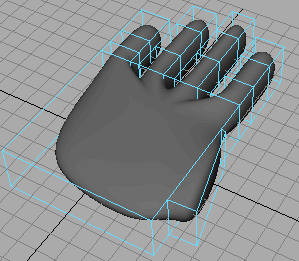
- Select the right-most face by dragging
a selection box around the tiny box at its center. (The subsequent
illustration shows which face to select.)
- Select
Edit Mesh > Extrude.
- Drag
the blue arrow manipulator outward a little to create the first
segment of the smallest finger.
The blue arrow turns
yellow when selected.
- Repeat the prior two steps to create
the middle segment of the smallest finger.
- Repeat the prior two steps once again
to create the top segment and complete the finger.
By creating three segments
for a finger, you mimic a real finger’s natural structure. The borders
between the segments have vertices (not displayed currently) that
let you reshape those regions, for instance, to create knuckles.
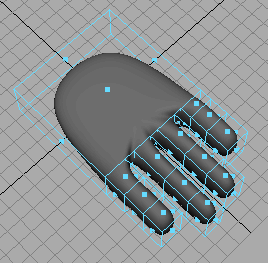
- Similarly, extrude the ring, middle,
and index fingers from the appropriate wide faces. Don’t extrude
the three small faces that lie between the wide spaces. Leave them
in position to allow for webbing between the fingers.
NoteDo not be concerned
if the hand you create does not match the lesson’s illustrations.
Your goal in this lesson is to learn the workflow of subdivision
surfaces, not to perfect your modeling technique.
Next, you extrude a thumb
using similar techniques as you used for the fingers. The following
steps are abbreviated. See the preceding pages for details on the
described tools, if necessary.
To split and extrude a face for the thumb
- Select LeftHand.
Make sure it is highlighted
in green in the scene view. If it is not green, select LeftHand
in the Outliner.
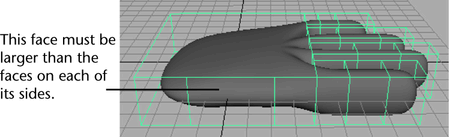
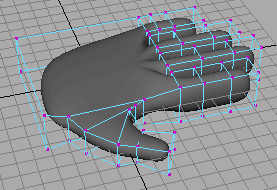
- Use
Edit Mesh > Split Polygon Tool to
split the side face in the thumb region into three faces.
While splitting, make
sure the middle face is larger than the outer faces as shown below.
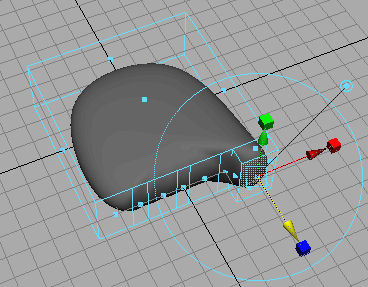
- Extrude the middle face and drag it directly
outward.
- Click the surrounding blue circle and
use the rotate manipulator to aim it in a direction appropriate
for a thumb.
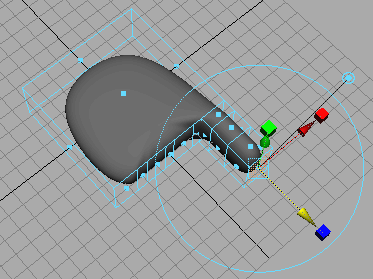
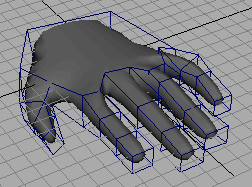
- Extrude
three times more to create each segment of the thumb. Use the extrusion
manipulator to rotate, move, and scale each extrusion to create the
desired shape of a thumb. Use the following figure as a guideline. Again,
it’s unnecessary to match the illustration or create a realistic
thumb for this lesson.
The extrusion manipulator
is easy to figure out by clicking and dragging its various elements.
If necessary, you can also use the conventional Move, Scale, and
Rotate Tools to reshape the faces that control the thumb’s shape.
- fIn the scene view, right-click
LeftHand and select Vertex from the marking menu. The purple vertices
at the corners of the faces control the adjacent region of the hand.
- Make
coarse adjustments to various parts of the hand by repositioning
the vertices with the Move, Scale, and Rotate Tools.
The Move
Tool works on individual vertices or groups of vertices.
Rotate and Scale works on two or more vertices. Undo any changes
you don’t like using Ctrl-Z (Windows and Linux) or Control-z (Mac
OS X).
Try to create the approximate
thickness, length, and curvature of a cartoon character’s hand and
fingers. There’s no need for perfection. You’ll refine the fingers
later.