


Learning Resources > Tutorials > Getting Started with Maya > NURBS Modeling > Lesson 3: Lofting curves to create a surface >
Using the Outliner to
parent objects
The Outliner is an editor that is useful for quickly examining the structure and components of a scene. You can use the Outliner to quickly parent objects to create an object hierarchy.
To parent an object using the Outliner
The Outliner window is displayed. A list of the scene’s components is listed in the Outliner.
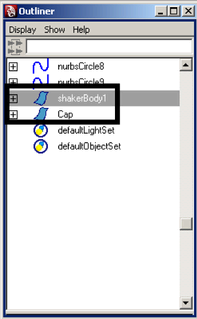
By parenting the objects, you can move, rotate, or scale the cap and the body as a single entity by selecting only the body.
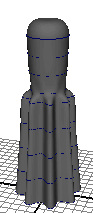
Notice that the salt shaker displays horizontal curves that wrap around the body. The curves are the original circles you used to loft the surface. Because these curves are part of the surface’s construction history, you can alter their shape if you decide you want to alter the shape of the body and the body will update based on the construction history.
If you prefer not to see the curves in the scene view, select the curves and select Hide Selection. The curves won’t appear when you render an image of the scene. Maya displays only surfaces, not curves, in rendered images.