Show in Contents

Add to Favorites

Home: Autodesk Maya Online Help

About Live

Live

Lesson setup

Preparing for the lessons
In the following lessons,
you will create a match move for live footage of a sweeping shot
of a backyard and fence. In the second lesson, you will load a fence
created in Maya to evaluate how well the Maya camera movement matches
the live-action camera.
To ensure the lesson
works as described, do these steps before beginning:
- Make sure you understand the basic usage
of the animation playback controls. See the chapter entitled “Animation”
in Getting Started with Maya to learn
about these controls.
- Select
Window > Settings/Preferences > Preferences.
Click the Timeline category under Settings and
make sure the Playback Speed is set to Play every
frame. Animation plays more accurately with this setting.
- Locate the Live Lesson Data at http://www.autodesk.com/maya-training in the Tutorials section.
You’ll need about 300
Mb of disk space and a program (such as Winzip) to extract the .zip
file.
- If Live doesn’t appear in the menu set
selection menu, select
Window
> Settings/Preferences > Plug-in Manager.
In the Plug-in Manager, locate mayaLive.mll
(Windows) and click the loaded checkbox. Wait about 20 seconds for
the operation to finish, then close the Plug-in Manager.
- Select
the Live menu set. All instructions
in this lesson assume you have the Live menu
set selected.
- Choose
Scene > New MatchMove.
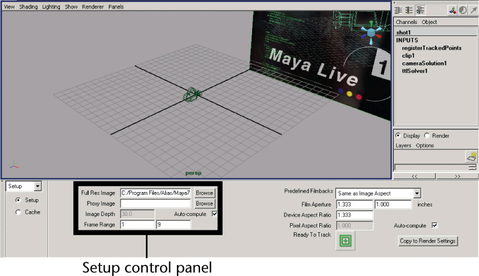
When you create a new matchmove scene, Live places
the Setup control panel at the
bottom of the standard Maya window. There are different control
panels for each of the main tasks: Setup, Track, Solve,
and Fine-Tune. The control panel
is where you control most of the Live operations.
Also notice Live creates
a camera and an image plane in your scene. This is the camera Live animates.
The image plane serves as the background plate when you look through
the camera. It is where the images for the live shot will appear
once you’ve loaded them.