Any Maya joint can be converted to a capsule. This is useful since you do not need to create a separate capsule object that would be parented to a joint. Instead, the joint itself can get the Muscle Object shape and be directly connected to the Muscle skin deformer.
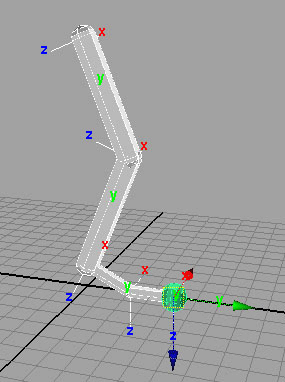
While it is not required, you want to align your joint axis such that one of the local axes points cleanly down the length of the joint chain. The default for Maya is X. You can use any free joint orient tool to align your joints that way, or before creating joints, you can use the Joint Tool settings and set the Orientation to yzx and the Second axis world orientation to +y.
Regardless, you need to know which axis you are using for the axis down the length of the joint.
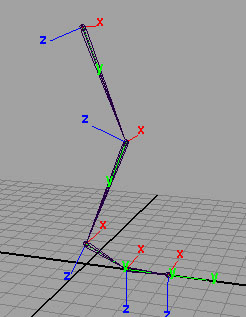

The objects are converted to have capsule shapes. You can now colorize and change other settings for the capsules. Their default length and radius is set based on the initial joint locations.