


Paint fluid properties
into grids
You can use the Paint Fluids Tool to place values in precise locations of a fluid grid, and you can edit existing values by scaling, smoothing, replacing, or adding to existing values with each brush stroke. The Paint Fluids Tool is an Artisan brush tool and therefore works like the other Artisan tools. For details, see How Artisan brush tools work in the Artisan guide.
To paint fluid property values, the Contents Method for the property must be defined as Static Grid or Dynamic Grid.
Painting property values in a 2D container is like painting on a canvas. Move the brush over the plane representing the container and drag to place property values in the grid.
To paint a fluid property in a 2D fluid container
 ).
). 
This option saves the values you paint to an initial state cache file so that when you rewind to the first frame of a simulation after playing it, your original painted values are restored. The values are saved when you quit the Paint Fluids Tool, when you change the current time, and when you change your selection. For information on initial states, see Set the initial state of a fluid.
If the selected fluid property is not set to Dynamic or Static Grid, you are prompted to set it.
See Paint Attributes.
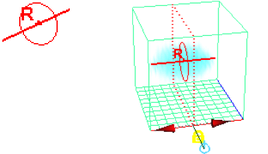
To paint in a 3D container you actually paint in two dimensions on “slices” of the container. A slice is a plane in X, Y, or Z that represents where you paint. (You could think of a slice as the canvas.) You paint each slice individually, but the accumulative effect of adjacent slices is a 3D fluid.
When you first select the Paint Fluids Tool, a paint slice displays at the origin of the fluid container. The slice is represented by a plane with dotted edges and fluid subvolume manipulators at one corner. When you move the pointer over the slice the pointer changes to a brush indicating that you can paint on the slice.

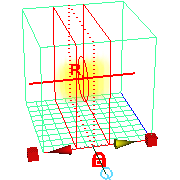
You control the location and thickness of the slices you paint using the fluid manipulators that appear at a corner of the slice. For details, see Display subvolumes of 3D containers.
To paint a fluid property in a 3D fluid container
).
This option saves the values you paint to an initial state cache file so that when you rewind to the first frame of a simulation after playing it, your original painted values are restored. The values are saved when you quit the Paint Fluids Tool, when you change the current time, and when you change your selection. For information on initial states, see Fluids initial state.
If the selected fluid property is not set to Dynamic or Static Grid, you are prompted to set it.
See Paint Attributes.
See Move the paint slice or subvolume.
The help line displays the location of the paint slice. For example:
The number of slices along each axis corresponds with the resolution of the fluid container. The numbering starts at 0. So if the resolution of the container is 10 10 10, then the slices are numbered from 0 to 9.
If you make the brush depth thicker than the depth of a displayed subvolume, only the subvolume will be painted.
Lock the view axes to prevent the paint slice from switching to another axis as you paint.
For details, see Display subvolumes of 3D containers.
Flooding a container is like taking a huge brush and applying its settings to all the voxels in the container or selected subvolume. When you flood a fluid container, the voxel values for the selected fluid property change according to the value and operation set for the tool.
 +f):
+f):
For details, see Display subvolumes of 3D containers.
You can paint a fluid while playback is running to get a feel for the dynamics. For example, you can paint Density and watch it the simulation run as you paint Velocity.
You are not prompted to save your initial state when you start paint during playback. Anything painted during playback will be lost. (If Auto set initial state is on, the results of your last painted stroke will still be saved as your initial state.)
Map values to container voxels
You can map image values into container voxels. The settings for the Paint Fluids Tool are applied to the voxels using the mapped values.
When you import an image into a 3D fluid, the values are mapped to the subvolume slices indicated by the subvolume manipulator.
When you export an image from a 3D fluid, the values that are exported are the values on the paint slice.
The values import/export as follows:
Values map to each of the RGB channels. For example, a Density value of 0.2 exports to RGB (.2, .2, .2)
Color maps directly to the RGB channels and Density maps to the Alpha channel.
The X, Y, Z direction of the velocity maps to RGB, respectively, and the velocity magnitude maps to the Alpha channel. To accommodate negative velocities, Velocity values are mapped as follows:
For details on mapping, see Map attributes in the Artisan guide.
Imported/exported Alpha values are remapped into/from the Min Value to Max Value range in the Paint Fluid Tool Settings.
You can select how you want the property values to display in shaded display mode as you paint. By default, only the values for the property you are painting display, but you can change this to display all the properties in the container as they would render. For details, see Display.
Click the Reset Tool button in the Tool Settings window to reset the Paint Fluids Tool to its default settings.
You can undo as many paint strokes as defined in the Undo category of the Preferences window ( Window > Settings/Preferences > Preferences).
Before
you paint attributes, set options for the Paint Fluids Tool in
the Tool Settings editor (
Fluid Effects > Add/Edit Contents > Paint Fluids Tool > ).
The settings in the Paint Attributes section determine the effect you will achieve when you paint with the tool. These settings are described in Paint Attributes.
For information on the other settings, see Fluid Effects > Add/Edit Contents > Paint Fluids Tool.