Show in Contents

Add to Favorites

Home: Autodesk Maya Online Help

Propagate topological changes from base shapes to their target shapes

Edit deformation effects

Lattice deformer

Paint blend shape deformer weights
With the Paint Blend Shape Weights
Tool, you can use a Maya® Artisan™ brush
to paint blend shape weights on your base shapes.
This tool is useful because it lets you set
your blend shape weights on a per vertex basis; giving you a finer
amount of control over the amounts of influence your target shapes
have on their base shapes. This tool also lets you paint the blend
shape weights for each target, and lets you create ‘partial’ targets
and target mixing.
When you paint blend shape weights, you can
also do the following:
- Create
a new target shape from the painted base shape.
See
To create a new target shape from the painted base shape.
- Import
or export blend shape weight maps.
Blend shape weight maps let you map attribute
values onto base shape surface vertices relative to the UVs. With
imported blend shape weight maps, tool settings are applied to the
base shape vertices using the mapped values. To produce good import/export
results, make sure that your base shapes have good UVs.
See
To import a blend shape weight map and
To export a blend shape weight map.
To
paint blend shape weights
- Select
your blend shape deformer’s base shape in the scene view.
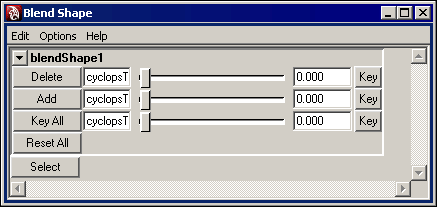
- Open
the Blend Shape Editor by selecting
Window > Animation Editors
> Blend Shape.
The Blend Shape editor appears.
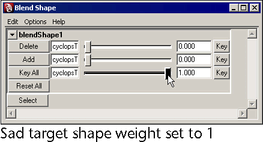
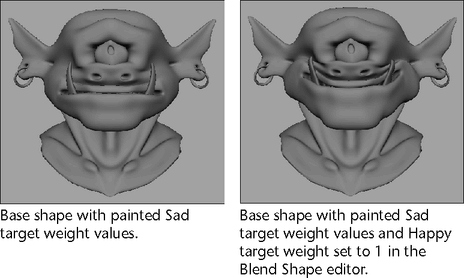
- In
the Blend Shape editor, select
the slider for the target shape whose weights you want to paint
and drag it to a value of 1.
The target shape now has 100% influence over
the base shape’s topology. The base shape deforms to reflect the
target shape’s topology.
- Select
Edit Deformers > Paint Blend Shape Weights Tool >
 .
.
The Paint Blend Shape Weights
Tool settings open in the Tool Settings editor.
See
Paint Blend Shape Weights Tool Settings.
- In
the Brush section, adjust the Opacity setting
as required.
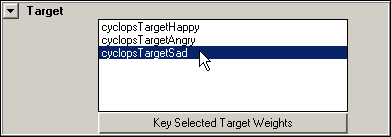
- In
the Target section, select the
target shape whose weights you want to paint on the base shape from
the list of targets. This is the same target shape whose weight
you set to 1 in the Blend Shape editor.
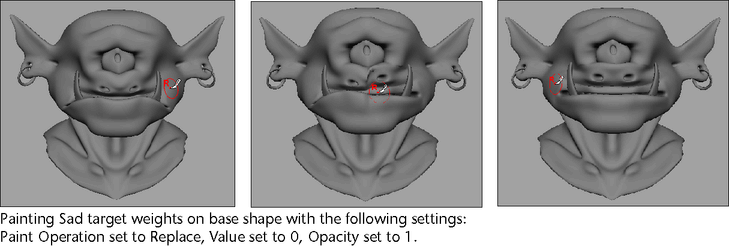
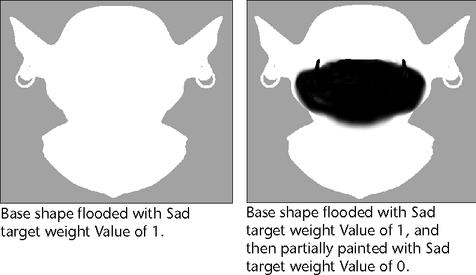
- In
the Paint Weights section, adjust the Value and Paint
Operation tool settings and paint the selected target’s
weights on its base shape to create the deformations you desire.
By default, your base shape is flooded with
a Value of 1.
A Value of
1 (full influence) appears as white painted
weights and a Value of 0 (no influence) appears
as black painted weights. All other Value settings
appear as different shades of gray.
TipTurn off Color Feedback and Show
Wireframe in the Display section
of the Paint Blend Shape Weights Tool settings
to better see the results of the painted blend shape weights on
the base shape.
- Key
the blend shape weights you just painted. See the following procedure.
- Repeat
steps 3-7 with your other target shapes to create additional deformation
effects.
To
animate painted blend shape weights
- Do
one of the following:
To
create a new target shape from the painted base shape
- Follow
the steps in the previous procedure until you have created a deformation
that you want to save as a new target shape.
- Select
your deformed base shape.
- Select
Edit > Duplicate.
A copy of your deformed base shape appears over
your base shape.
- Select
the Move Tool and drag the copy of
your deformed base shape away from the original base shape.
- Rename
the copy of the deformed base shape using the naming conventions
of your current target shapes.
- Select
the copy of the deformed base shape and then
 -click
the original base shape.
-click
the original base shape.
- Select
Edit Deformers > Blend Shape > Add.
The copy of the deformed base shape you created
is added as a new target shape to your blend shape deformation.
To export a blend shape weight map
- Paint
your blend shape weights on your base shape until you obtain the
deformation or look that you want to export as
a map.
- Select
your painted base shape.
- In
the tool settings, open the Attribute Maps section
and then the Export section.
- Set
the Export settings and then click the Export button.
For descriptions of the Export settings,
see
Paint Blend Shape Weights Tool Settings.
The Export browser
window appears.
- Browse
to the location to which you want to save the map, specify a name
for the map, and then click Export. By default,
Maya will place your map in the sourceimages folder
of your current project.
Your base shape’s current deformations are saved
out as an attribute map.
To import a blend shape weight map
- Select
your deformed base shape.
- In
the Paint Blend Shape Weights tool settings,
open the Attribute Maps section and then
the Import section.
- Set
the Import settings and then click the Import button.
For descriptions of the Import settings,
see
Paint Blend Shape Weights Tool Settings.
The Import browser
window appears.
- Browse
to the location where the map you want to import resides, select
the map file, and then click Import.
Your base shape deforms according to the tool
settings specified by the imported attribute map.