


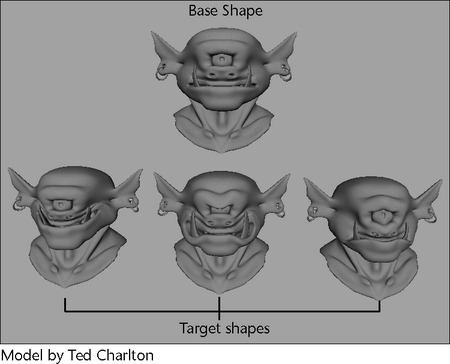
Propagate topological changes from base shapes
to their target shapes
To update my blend shape deformations
The topology of your target shapes change to reflect the topology of their base shape and all your base shape’s modeling history is baked. See Edit Deformers > Blend Shape > Bake Topology To Targets.
How do I use the Paint Blend Shape Weights Tool?
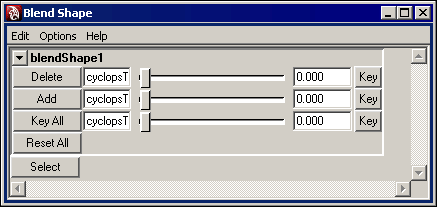
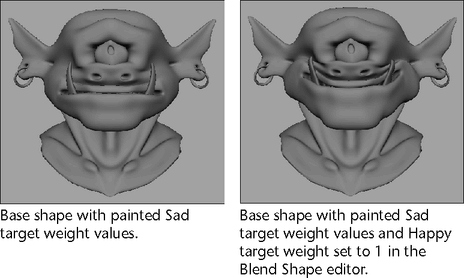
The Blend Shape editor appears.
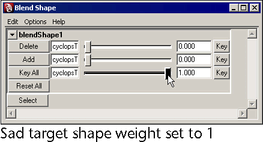
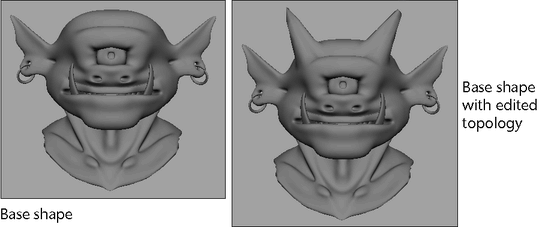
The target shape now has 100% influence over the base shape’s topology. The base shape deforms to reflect the target shape’s topology.
 .
.
The Paint Blend Shape Weights Tool settings open in the Tool Settings editor. See Paint Blend Shape Weights Tool Settings.
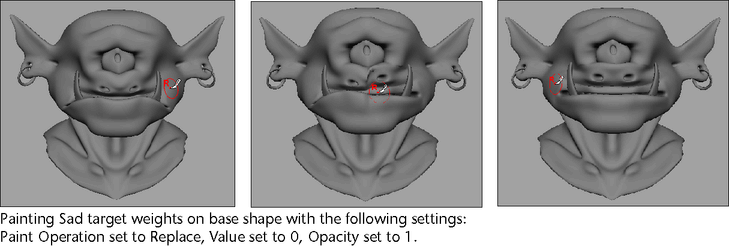
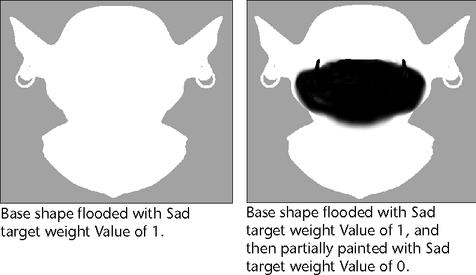
By default, your base shape is flooded with a Value of 1.
A Value of 1 (full influence) appears as white painted weights and a Value of 0 (no influence) appears as black painted weights. All other Value settings appear as different shades of gray.
To animate painted blend shape weights
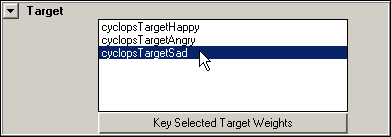
This menu item keys the painted blend shape weights for the selected target shapes.
This button keys the painted blend shape weights for the target shape selected in the target list.
To create a new target shape from the painted base shape
A copy of your deformed base shape appears over your base shape.
 -click
the original base shape.
-click
the original base shape.
The copy of the deformed base shape you created is added as a new target shape to your blend shape deformation.
To export a blend shape weight map
Your base shape’s current deformations are saved out as an attribute map.
To import a blend shape weight map
Your base shape deforms according to the tool settings specified by the imported attribute map.
Paint Blend Shape Weights Tool Settings
For descriptions of the Paint Blend Shape Weights Tool options common to all Artisan tools (such as those in the Brush, Stroke, and Attribute Maps sections), see Artisan Tool Settings in the Artisan guide.
Paint Operation
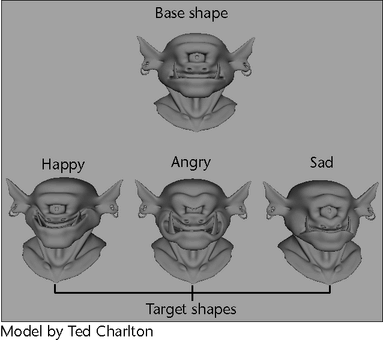
The paint operations define how your target shape weights are applied to the base shape.
Sets the minimum and maximum possible paint values. By default, you can paint values between 0 and 1. Setting Min/Max Value you can extend or narrow the range of values. Negative values are useful for subtracting weight. For example, if you set Min Value to -1, Max Value to -0.5, and select Add for the operation, you would subtract 0.5 from the weight of vertices you paint. Positive values are used as multipliers.
Clamp
Select whether you want to clamp the values within a specified range, regardless of the Value set when you paint.
Click Flood to apply the brush settings to all the weights on the base shape’s vertices. The result depends on the brush settings defined when you perform the flood. See Flood paint in the Artisan guide.
Animate > Set Blend Shape Target Weights Keys
Keys the target shape blend shape weights for the current blend shape deformation. When this menu item is selected, the following can occur: